Rowland Oakes map: what the parchment actually tells you
The first time a player finds a scrap of parchment in a quest, the instinct is to read it like a screenshot of a full map screen. The Rowland Oakes map in Hogwarts Legacy is a hand-drawn in-world prop, not a UI overlay, and treating it as a navigation widget is the most common reason players wander the North Hogwarts Region in circles. The parchment is one object inside a small investigation arc that starts in the Transfiguration Courtyard and ends at a locked door inside the Korrow Ruins, and the map’s job is to point the player toward a single outdoor landmark rather than to render a complete region.
For developers and technical designers, this quest is a useful case study in low-cost wayfinding. The designers hand the player a physical prop, anchor the next destination to a named region, and let the open-world compass close the gap. That pattern is worth studying because it does not require custom minimap layers, dynamic fog-of-war updates, or a hand-authored waypoint system per quest. It uses the existing region compass plus a verbal cue: travel to the westernmost point of the North Hogwarts Region. It also makes a deliberate choice to keep the prop visually rich but informationally thin, which is a tradeoff that shows up in many open-world systems and rarely gets discussed outside postmortems.
This article breaks down the prop, the route it implies, the quest steps that depend on the map, and the design lessons the quest shares with other open-world traversal systems. The goal is practical: a player who has just picked up the parchment should know what to do next, and a designer reading along should be able to extract a reusable pattern from the way Hogwarts Legacy solves a small navigation problem. The same notes are useful for writers who want to understand how a short quest can still feel hand-authored without spending weeks on bespoke waypoint scripting.
Quest context: where the Rowland Oakes map fits in the story
The parchment is not a standalone collectible. It is the central clue in the side quest “The Tale of Rowland Oakes,” which only becomes available after the main quest “The Helm of Urtkot” has been completed. The quest is given by Adelaide Oakes in the Transfiguration Courtyard, in The Astronomy Wing of Hogwarts Castle, and her first line of dialogue establishes the framing: her uncle may be in trouble and she wants a stranger to confirm what she has only inferred. The choice the player makes in that opening dialogue does not change the map or the route, but it does change Adelaide’s later reactions when the player returns to report on what was found at the camp and inside the ruins.
The quest has three structural beats, and the map sits in the middle beat:
- Investigate the campsite. After talking to Adelaide, the player travels to Rowlands campsite in the North Hogwarts Region, clears a small goblin presence, and searches the area. The map is found near the western end of the campsite.
- Interpret the map. The parchment shows the path Rowland took from his original camp and is the bridge between the campsite and the next location.
- Reach the Korrow Ruins. The map directs the player to the westernmost point of the North Hogwarts Region, where the Korrow Ruins sit. The player clears the enemies, enters the tunnels, and proceeds to a crossroads that contains a level 1 locked door.
That sequence is short, but it does a lot of work. It teaches the player that in-world props can carry navigational information, it routes the player through a combat encounter, and it ends at a locked door so the next content beat can pick up. For a player, the practical question after the campfire fight is simple: where do I go with this piece of paper. The answer is encoded in the map’s single legible line of information, and the rest of the navigation is delegated to systems the player is already using.
What the map actually depicts
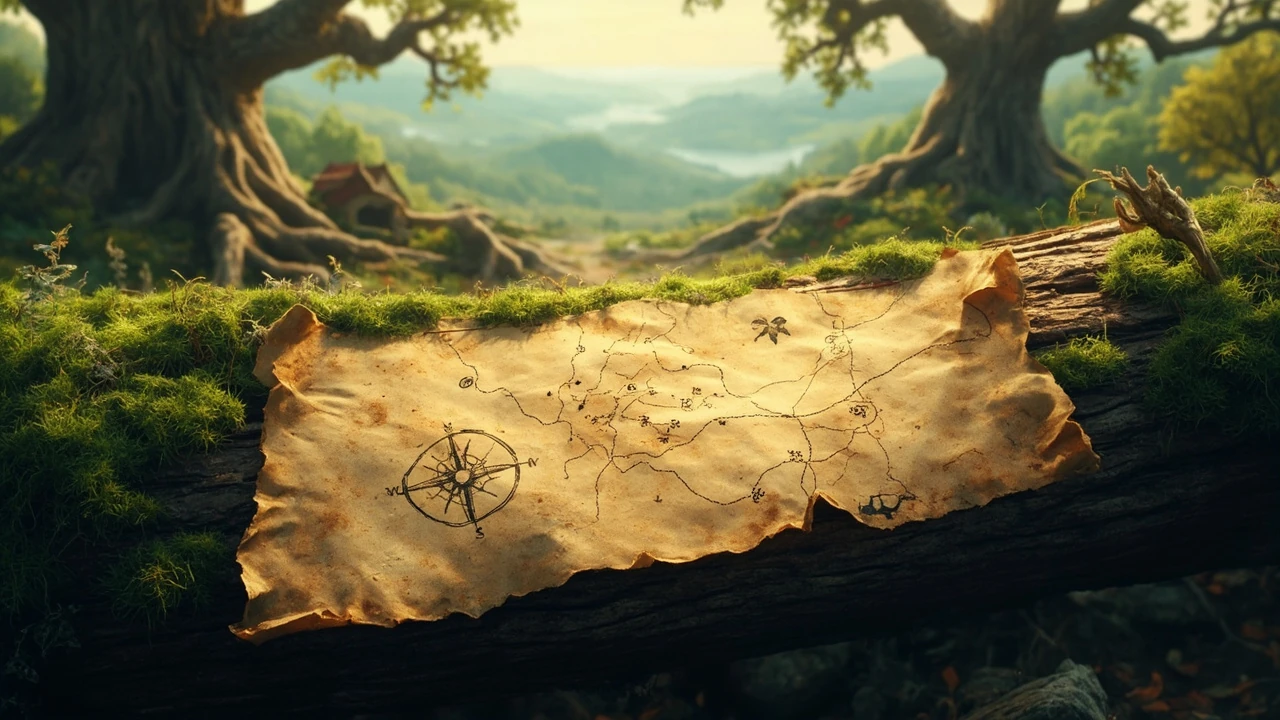
Because the prop is hand-drawn, its readability varies from player to player, and the design intentionally uses that ambiguity. The map does not show a precise turn-by-turn trail. It shows Rowland’s general line of travel from his original camp to a destination drawn at the western edge of the parchment. The destination is the Korrow Ruins, but the player is not expected to recognize the ruin from a sketch. Instead, the map relies on a verbal cue that the quest log and dialogue reinforce: travel to the westernmost point in the North Hogwarts Region. This is a useful technique for art teams because it lets the prop be styled like a real artifact without forcing the design team to label landmarks the player has not yet visited.
Three details are worth paying attention to when the parchment is on screen:
- Origin point. The map begins at Rowland’s original camp, which is implied to be the same campsite the player just cleared. That gives the prop a real-world anchor and makes its drawing directionally honest, even though the sketch is not to scale.
- Trail. A short dashed or curved line travels west from the origin. It is decorative, not literal, and it does not need to be followed on foot because the overworld compass does that work. Designers will recognize this as a classic example of “atmospheric” linework that exists for character, not for routing.
- Destination glyph. A small symbol at the western edge hints at ruins. The player reads that as the Korrow Ruins because the quest log says so, not because the icon is unambiguous. Several of the icon shapes on the parchment are reused for unrelated features elsewhere in the game, so the icon alone would not be enough to identify the destination.
The result is a prop that looks rich but communicates very little. That minimalism is the point. The map is a wayfinding excuse, not a puzzle. The designers chose to spend player attention on the combat encounter, the dialogue, and the locked door rather than on decoding a hand-drawn line. Players who try to extract more from the prop than it offers usually end up reading the journal and realizing that the journal was already saying the same thing in plain text.
Step-by-step route using the map
The route that the map implies, in practical terms, is short. It is also the same route the quest log describes, so players who lose track of the map can follow the journal and end up in the same place. The following order is the order the quest intends, and most players will finish the whole sequence in well under twenty minutes on a first playthrough.
- Finish “The Helm of Urtkot” so the quest unlocks. Until that main quest is complete, Adelaide Oakes will not offer the side quest, and the journal will not list it.
- Fast travel to the Transfiguration Courtyard Floo Flame inside Hogwarts Castle and talk to Adelaide Oakes to start “The Tale of Rowland Oakes.” The first dialogue options are flavor choices and do not branch the map or the destination.
- Open the map, set a waypoint on Rowlands campsite in the North Hogwarts Region, and travel there. The fastest approach is usually a broom or a Mount from a nearby Floo Flame, because the camp sits in uneven terrain and the on-foot approach is longer than the bird’s-eye view suggests.
- Clear the goblins at the campsite. The encounter is small but aggressive, so use crowd control or high-damaging spells before searching the area. Levioso, Confringo, and basic shield charms are more than enough at the recommended level.
- Pick up the map prop near the western end of the campsite. The quest updates at this point and the journal explicitly mentions Rowland’s map. The prop is small, and it sits on a crate or a tree stump depending on spawn variance, so it is worth circling the area before assuming it has been missed.
- Set a new waypoint to the westernmost point in the North Hogwarts Region. The Korrow Ruins are the landmark the map is pointing toward, and the compass will guide the player along the ridges and paths that connect the two locations.
- Defeat the enemies outside and inside the entrance to the Korrow Ruins. The interior has several groups spaced along a single tunnel, so resource management matters more than raw damage output. Wiggenweld potions are cheap to craft at this stage and are worth topping up before entering.
- At the crossroads inside the tunnels, take the right-hand path. The left-hand path leads to a level 1 locked door with a separate reward; the right-hand path is the route the Rowland Oakes quest expects. The level 1 lock is a soft branch and can be returned to later if the player does not yet have the required Alohomora level.
Players who skip the campsite and head straight to the Korrow Ruins will still be able to finish the quest, because the journal updates the destination automatically. The map, however, only enters the inventory if the campsite is actually visited, and the design assumes that players will find it on the way. Players who want to see the prop for its own sake will need to physically walk through the camp, because there is no secondary spawn point for the parchment anywhere else in the region.
Reading the map without getting lost: a practical checklist
Open-world quests that depend on a prop instead of a quest marker tend to lose players when the prop is read literally. The Rowland Oakes map is easier to use if a few rules of thumb are kept in mind. These rules are written for first-time players, but they also cover the more common edge cases that come up when a player is returning to the area after a long break or after a different storyline.
- Use the prop as a direction, not a path. The map says go west. It does not say walk along a specific trail, and the dashed line is meant to convey intent rather than geography.
- Trust the region compass. The North Hogwarts Region is large, and the compass is the actual navigation tool; the map only identifies which direction matters. The waypoint system will route around cliffs and water without any input from the prop.
- Cross-reference with the quest log. The journal is a redundant source of truth. If the prop and the journal disagree, the journal wins because it is the system’s authoritative state. This is true for almost every prop-based quest in the game.
- Do not read the parchment upside down. The map is drawn from a north-up convention, but the camp itself is approached from the south, so the prop’s “you are here” point is the southern edge. Players who have rotated the parchment in the inventory view sometimes mistake the origin marker for a feature.
- Save before entering the ruins. The interior has multiple enemy groups, and the locked door is a soft branch, so a single manual save makes both the quest reward and the optional door easier to revisit without replaying the dungeon.
- Bring a broom. The path west from the camp crosses two shallow valleys, and a broom or a fast-mount traversal makes the route much more forgiving if a player overshoots the Korrow Ruins entrance.
- Check the time of day in-game. The camp and the approach to the ruins read more clearly in daylight, and a few of the pickup prompts for the parchment are easier to spot when the lighting is bright. This is a small quality-of-life tip rather than a hard requirement.
For most players, the checklist collapses to two actions: clear the campsite, then ride west to the Korrow Ruins. The other items are safety nets for the case where a player has approached the quest from a different Floo Flame and is not sure which direction is west in the local geography. The same rules generalize to other short side quests in the region, and they are worth keeping in mind for designers thinking about how much onboarding a prop-based quest really needs.
What the Korrow Ruins contain and why the map ends there
The Korrow Ruins are a small dungeon that exists for several quests, not only “The Tale of Rowland Oakes.” The interior is a single main tunnel that forks into a left path with a level 1 locked door and a right path that continues the quest. The locked door is a small design choice that gives the dungeon a second reason to exist: even if a player is not on the Rowland Oakes quest, the door offers a discrete reward for players who explore. The right path leads to the next beat of the story, where the player continues the investigation. The map’s job is finished by the time the player enters the ruins. Its purpose was to convert a vague verbal prompt into a concrete direction the player could follow, and the moment the player is inside the dungeon, the prop has done its work.
For a designer, the Korrow Ruins are interesting because they sit at the intersection of two systems: the prop-driven wayfinding used by Rowland Oakes and the more conventional quest-marker system used by longer regional arcs. The dungeon does not care which system the player used to find it, and the interior is set up the same way regardless of how the player arrived. That decoupling is one of the reasons the prop pattern can be used safely in short quests: the destination can be authored as a normal landmark, and only the entry point uses a special mechanic.
Common player mistakes and how to avoid them
The Rowland Oakes quest is short, but the same handful of mistakes come up repeatedly in player reports. They are worth cataloging because they show where the prop-based wayfinding pattern is fragile, and they double as a checklist for designers who want to ship similar quests in their own projects. Each mistake has a known workaround, and none of them break the quest permanently.
- Approaching from the wrong Floo Flame. Some Floo Flames in the southern part of the North Hogwarts Region place the player on the wrong side of a ridge, and the westernmost point of the region ends up much further than it looks on the world map. The cleanest approach is to fast travel to the closest Floo Flame that sits at similar elevation to the camp, and to use a broom for the final leg so elevation changes are not a problem.
- Fighting the goblins first and forgetting the map. The map sits at the western end of the camp, which is past the first goblin group. Players who finish the fight and immediately ride west sometimes miss the pickup because they are already moving. The prop only enters the inventory if the player physically searches the spot, and the pickup glow is subtle compared with the larger quest items in the game.
- Trying to follow the dashed trail literally. The map’s line is symbolic. Following it on foot usually routes the player through rougher terrain than the roads, and the time saved by ignoring the line is significant. The dashed trail is best read as a confirmation of the direction the journal is already describing, not as a turn-by-turn instruction.
- Going to the locked door first. The left-hand path is a side attraction, not the main quest. Players who go there first complete a small bonus objective but then have to backtrack to the right-hand path, which costs time and resources. The right path is always the one that continues the main story beat inside the dungeon.
- Forgetting to read the journal entry after the pickup. The journal updates when the map enters the inventory, and the update is the most explicit description of the destination. Players who skip the journal and only look at the parchment sometimes end up with the right general direction but no clear endpoint, which is the exact gap the journal exists to close.
None of these mistakes are fatal. They all extend the quest by a few minutes, and the journal updates usually nudge the player back on track. They are worth listing because the same design lessons show up in other open-world quest systems that lean on in-world props. The mistakes are not random; they are the predictable failure modes of a system that uses redundant navigation channels, and they tend to cluster around the points where the redundancy breaks down.
Design lessons for open-world wayfinding
Quests that hand the player a prop and ask them to interpret it are a small but persistent pattern in open-world design. The Rowland Oakes quest is a clean example because it uses the pattern without depending on it. The prop is optional, the journal covers the gap, and the player can finish the quest by reading the journal alone. That redundancy is what makes the pattern work in practice, and it is also what makes the prop feel hand-authored rather than mechanical. Designers who copy the pattern should plan the same redundancy from the start, because retrofitting a redundant channel after the quest is in content lock is much more expensive than designing it in.
Lesson 1: props can be redundant, not authoritative
Open-world games that treat in-world props as the only source of truth for navigation tend to frustrate players who misread the prop. The Rowland Oakes map is allowed to be ambiguous because the quest log and the region compass are the authoritative sources. A useful design rule is that an in-world prop should always be a redundant channel layered on top of a system that already works. When the prop is the only channel, designers need to spend much more time on the prop’s clarity, and even then it is hard to predict how a player will read a hand-drawn icon. The redundancy lets the prop be expressive without being a liability.
Lesson 2: a single verbal cue is enough
The map communicates three things: direction (west), destination class (ruins), and a region anchor (North Hogwarts). The single most important cue is the direction, and the verbal line “travel to the westernmost point in the North Hogwarts Region” is enough on its own. The prop just makes the cue more memorable. This is a useful template for any quest that needs to feel hand-crafted without spending time on a hand-authored waypoint. Designers can use a single line of dialogue plus a single parchment to anchor an entire beat, and let the rest of the routing fall back on the systems that already exist.
Lesson 3: combat and navigation can share an encounter
The goblin fight at the campsite is also the player’s first view of the camp and the prop’s pickup location. By the time the player searches the area, they are already oriented. Pairing a small combat encounter with a pickup is a low-cost way to make navigation feel earned rather than handed to the player. The same trick works in any region that already needs a combat encounter for level pacing: the encounter can be placed at the prop’s pickup spot so the player learns the geography during the fight rather than after it.
Lesson 4: a locked door can carry a soft branch
The level 1 locked door at the Korrow Ruins crossroads is a soft branch: it is there, it is reachable, and it offers a small reward, but it does not block the main quest. Designers who want a dungeon to feel layered can use the same pattern: a small bonus objective that sits next to the main path without rerouting it. The soft branch is also useful as a pacing tool, because it gives players who want more from a dungeon a reason to come back without forcing extra content on players who are just trying to finish the quest.
Lesson 5: a prop can carry character, not just information
The Rowland Oakes map does not add new information compared with the journal, but it does add character. The hand-drawn style, the dashed trail, and the implied origin point all make the quest feel like an investigation rather than a checklist. Designers who treat props as a way to add voice to a quest, rather than as a way to compress information, tend to get more value out of the same prop budget. The cost is the same, and the payoff is much higher for players who pay attention to world objects.
Comparison: prop-based wayfinding vs UI wayfinding
Open-world games use two broad approaches to in-quest navigation. The Rowland Oakes quest is a clean example of the first. The second is more common in modern RPGs and shows up in many of the same games. The two approaches are not mutually exclusive, and most large games mix them depending on the kind of quest being shipped. The comparison below is meant to make the trade-offs explicit, so designers can pick the right approach for a given quest without having to invent the analysis from scratch.
| Attribute | Prop-based wayfinding (Rowland Oakes map) | UI wayfinding (quest marker + minimap) |
|---|---|---|
| Primary signal | In-world parchment, verbal cue, region compass | Quest marker on the HUD, waypoint on the world map |
| Reliance on map screen | Low; map screen is used for fast travel only | High; player is expected to read the marker every few seconds |
| Failure mode | Player misreads the prop and walks the wrong way | Player ignores the environment because the marker is enough |
| Cost to author | One prop, one line of dialogue, one journal update | One marker placement, one minimap layer entry, one tracking component |
| Player experience | Feels investigative, slows the player briefly | Feels efficient, but reduces environmental attention |
| Best use case | Short quests that want a hand-crafted feel | Long fetch quests that need to keep moving |
| Replay value | Players revisit the prop for the writing and art | Players ignore the marker after the first run |
| Accessibility cost | Higher; players with low vision may need the journal | Lower; markers are legible at a glance |
The Hogwarts Legacy designers clearly chose prop-based wayfinding for the Rowland Oakes quest because the quest is short, the destination is fixed, and the player is meant to feel like they are reading a real document. A longer quest that required several stops would have needed a UI marker just to keep the player oriented. The trade-off is intentional, and it is one of the reasons the quest feels small and tidy. A useful rule of thumb is to default to UI wayfinding for any quest with more than two stops, and to consider prop-based wayfinding only when the quest has a single anchor and a strong character beat to deliver.
How the map interacts with other North Hogwarts quests
The North Hogwarts Region is dense with side content, and the Rowland Oakes quest overlaps with several of them in space if not in story. The map is a Rowland-specific prop, but the destination it points to is a shared landmark. The table below lists the most common overlaps and notes how the prop-based wayfinding interacts with the UI wayfinding used by those quests. None of the overlaps block the Rowland Oakes quest, but they do change the experience of playing it in a region that is already busy.
| Quest | Starting point | Relation to the Korrow Ruins |
|---|---|---|
| The Tale of Rowland Oakes | Adelaide Oakes, Transfiguration Courtyard | Direct destination; the map points here |
| North Hogwarts Merlin Trials | Various Trials in the region | Some Trials sit on the approach to the Korrow Ruins |
| Field Guide pages in the region | Scattered in the open world | Some pages sit on the route west of the campsite |
| Beast dens and Merlin Trial clusters | Various in the North Hogwarts Region | Often share the same ridges used to approach the ruins |
| Regional side quests with their own markers | Various NPCs in the region | Some routes cross the approach to the ruins |
The shared geography means a player who is doing the Rowland Oakes quest for the first time will often pick up Field Guide pages, complete a Merlin Trial, or stumble across a beast den on the way. That incidental content density is part of why the designers can afford to use a prop instead of a marker. The route is interesting even if the player walks it without a destination in mind, and the player is rewarded for attention in a way that a UI marker would not allow. The same density is also why the prop pattern is not used for every quest in the region: a long quest that needs to thread between several landmarks would lose too much of the player’s attention to incidental content.
Player experience after the map is used
Once the map has been picked up, the player has several practical options. None of them are required, but they are worth being aware of because the quest is short and the time investment is low. The options below are listed in roughly the order that most players end up using them on a first run, and each one changes the texture of the quest without changing the destination.
- Fast travel directly to the ruins. If the player is confident about the destination, the Korrow Ruins are reachable from a Floo Flame that sits on the western edge of the region, and a direct fast travel skips the road entirely. This is the fastest path, and it works even if the player skipped the campsite and did not pick up the map.
- Detour for Field Guide pages. The route from the camp to the ruins crosses several high-ground spots that contain collectible pages. Picking them up while the compass is set to the ruins costs almost no extra time and adds a small completion bonus to the regional map.
- Detour for the locked door first. If the player has an Alohomora level that can open the level 1 door, the left-hand path is a small side objective that fits inside the same dungeon run. The reward is modest but worth the detour if the player is already inside the ruins.
- Skip the prop and follow the journal. The quest log carries the same information as the map, and the journal is the most reliable source for players who do not want to read the parchment. This is the recommended path for players who are returning to the quest after a long break.
- Use a mount for the final leg. The western approach to the ruins crosses a small valley, and a Hippogriff or a broom makes the descent much faster than walking. This is purely a quality-of-life choice and does not affect the quest outcome.
Each option changes how the quest feels without changing what the quest does. The map is a prop, not a puzzle, and the quest does not reward the player for reading it carefully. It rewards the player for showing up at the right place. The flexibility is part of the design, and it is one of the reasons the quest holds up well on replays: a player who is returning for the reward rather than the experience can skip the prop entirely, while a player who is returning for the writing can spend as much time as they like on the parchment.
What the map does not tell the player
Several pieces of information are deliberately missing from the parchment, and that absence is part of the design. The map is a single-purpose object, and the designers chose to keep it that way rather than overload it with secondary information that would compete with the journal. The list below is also a useful prompt for designers who are thinking about how much information a single prop should carry.
- No enemy markers. The map does not warn the player about the goblin camp or the enemies inside the ruins. That information is delivered by the encounter itself, not by the prop, and the lack of warning is what makes the goblin fight feel like a real interruption rather than a scripted event.
- No minimap layer. The map is a world object, not a UI element. It does not unlock a sub-region on the world map, and it does not mark the Korrow Ruins with a permanent icon. The Korrow Ruins marker, if it appears, is added by the journal rather than by the prop.
- No quest progression. The map does not update as the player progresses. Once it is picked up, it stays the same parchment in the inventory, and inspecting it after the quest is finished shows the same drawing the player found at the campsite.
- No hidden clue. The map does not encode a riddle. Its only job is to point west, and the rest of the navigation is handled by the standard systems. Players who try to extract hidden information from the parchment end up reading the journal and realizing the journal was already saying the same thing in plain text.
- No scale or distance marker. The map does not tell the player how far the westernmost point is, and the dashed trail is not a measure of travel time. The actual distance is short, and the compass handles the rest.
- No label for the origin. The map does not name the camp, and it does not name the destination. The names come from the journal and the world map, and the prop is intentionally silent on both.
For designers, the lesson is that a prop does not have to be dense to be useful. A small, single-purpose object can carry a quest beat on its own, and trying to make the prop do more usually makes the quest harder to read. The same lesson applies to environmental storytelling more broadly: a single, well-placed detail is usually more effective than a cluster of competing details that all want the player’s attention.
Frequently asked questions
Where do I find the Rowland Oakes map in Hogwarts Legacy?
The map is found at Rowlands campsite in the North Hogwarts Region. The quest “The Tale of Rowland Oakes” must be active, and the map is picked up near the western end of the camp after the goblin group is dealt with.
Do I need the map to finish the quest?
No. The quest journal and the region compass carry the same information. The map is a redundant, in-world representation of the route and is useful for players who like to read the props, but it is not required to reach the Korrow Ruins.
Which direction does the map point?
The map points west, from the campsite toward the westernmost point in the North Hogwarts Region. The Korrow Ruins are the landmark at that western edge.
Can I read the map upside down?
It is possible to misread the prop if the parchment is rotated in the inventory screen. The map is drawn with north up, and the camp is approached from the south, so the parchment’s “you are here” point is on the lower edge of the drawing.
What level should I be to do the Rowland Oakes quest?
There is no explicit level requirement. The quest becomes available after “The Helm of Urtkot” is completed, and the encounters are tuned to that point in the story. Players who are significantly under-leveled for the region will still be able to clear the camp, but the interior of the Korrow Ruins has a few enemies that benefit from upgraded spells.
Is the level 1 locked door in the Korrow Ruins part of the quest?
No. The left-hand path at the crossroads leads to a level 1 locked door that is a separate, optional objective. The right-hand path is the route that “The Tale of Rowland Oakes” expects the player to follow.
Does the map change if I revisit the camp?
No. The map is a static prop. Once it is in the inventory, it does not update, and the camp does not regenerate goblins after the quest is complete.
Can I sell or discard the map?
The map is a quest item and cannot be sold or discarded. It stays in the quest section of the inventory until the quest is finished.
What happens if I leave the quest mid-way?
The quest stays in the journal, and the waypoint remains on the world map. The player can return at any time, and the prop remains at the campsite until it is picked up.
Is the Korrow Ruins entrance the only way to reach the quest area?
For the purpose of this quest, yes. The Korrow Ruins entrance is the only path that leads to the quest’s interior, and fast travel does not bypass it.