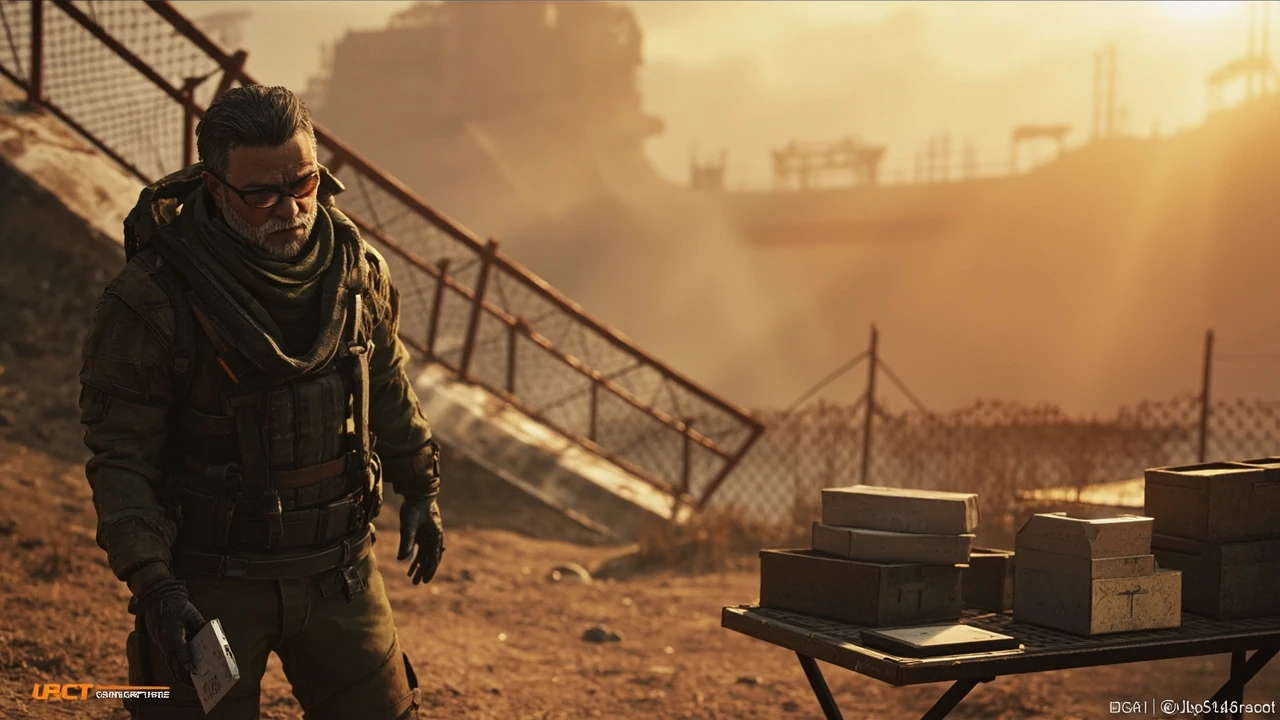
A dam surveillance key in ARC Raiders is a single-use access item that opens one specific locked room inside the Dam map. The map is one of the most vertical and container-dense locations in the extraction loop, and the room the key opens contains mid-to-high tier gear, so players plan their route around the key rather than treating it as incidental loot. This guide covers what the item is, how to acquire it, how the lock it opens behaves, and how to keep the key from being the reason a raid ends in the extract screen with an empty bag.
Dam surveillance key in ARC Raiders
The item itself is small, about the size of a flat credit-card, with a faded printed serial along one edge. It does not stack in the inventory, it does not repair, and the in-raid tooltip describes it as a “single-use area access” item rather than a quest token. Because the description is generic, players who find one in a field cache without prior research often drop it as vendor trash. That is the most expensive mistake a player can make with the key, and it happens more often than the surrounding loot economy would suggest.
What the key actually does
The item grants entry to the surveillance control room attached to the dam structure, a single locked door that cannot be bypassed with a normal lockpick or by destroying the lock. The door has no alternate access point, and the room sits behind a security corridor that raiders cannot reach without first solving the key prompt. Inside, the room contains a fixed loot table rather than a randomized drop, so the contents are predictable from one raid to the next. That predictability is the reason the key is worth tracking: a squad that knows exactly what is behind the door can decide in advance whether the rest of the route is worth the detour.
The fixed table also matters for the broader crafting economy. Most randomized containers in ARC Raiders pay out in calibers, scrap, and small parts that have to be filtered through a vendor before they become useful. The surveillance room bypasses that filter and pays in finished components, which is why three key runs tend to advance a squad’s crafting queue further than ten runs of standard upper-tier loot. The room is not glamorous, but it is efficient, and efficiency is what most trios are short on by the mid-game.
Why the Dam map is the bottleneck
Dam is a long, multi-level map with three main vertical tiers: the spillway and intake structures at the bottom, the maintenance yard in the middle, and the control rooms and catwalks on top. The surveillance room sits on the upper tier, so reaching it requires crossing at least one of the central bridges or climbing a maintenance stairwell. Every squad in the raid has a reason to be on those routes because the high-value loot spawns are clustered along the same chokepoints. Players who carry the key into the open without a plan are announcing to nearby squads that they intend to push the upper tier, which is usually a fight nobody wins cleanly.
The map’s audio design compounds the problem. Concrete corridors and standing water on the spillway level carry footsteps further than players expect, and a single careless sprint on a metal stairwell can be heard by an overwatch squad two containers over. The map is not hostile on its own, but it punishes the same hesitation that any other extraction map punishes: stopping in the open, sprinting across a known sight line, and using a key while the squad is still in motion. Each of those mistakes is a separate failure mode, and the rest of this article treats them as such.
Where the dam surveillance key comes from
The key enters the stash in three predictable ways. None of them are guaranteed in any single raid, so a player who wants the key on demand needs to know which source to prioritize. The order below is also the order of reliability, and most squads default to the top of the list before falling back to the others.
Source 1: vendor rotation
The Dam surveillance key appears on the rotating stock of one of the in-raid vendors. Stock is limited, refreshes on the server-wide timer rather than per player, and the key is usually bundled with other location keys rather than sold on its own. Players who rely on the vendor should check the stock screen before queuing a raid because the key sells out quickly on weekends and during limited-time events.
The vendor screen also tells the squad which other map keys are available on the same tick, which matters because the same currency pool is used to buy all of them. Spending the entire pool on the dam surveillance key and skipping a cheaper spaceport or refinery key that also rotates that week is a common budgeting mistake. The vendor is a stock screen, not a wish list, and treating it like a shopping list is how trios end a patch with three dam keys and no working kits for the other maps in the rotation.
Source 2: field caches and POI loot
Dam-specific field caches and certain POI containers in the upper tiers of the map have a chance to drop the key. The drop is not on every container and not every raid, so the key is treated as a bonus rather than a planned pickup. Field caches are usually looted after the main route is cleared, so a squad that finds a key in a cache often has to backtrack across the map, which is one of the more common ways raids end in a firefight.
POI containers on the upper tier that have a higher chance of dropping the key include the wall-mounted cases next to the catwalk offices and a single floor safe inside the maintenance office. The wall cases are easy to check on the way up; the floor safe is in a room that is often already looted by the time a squad reaches it, so a key that drops from the safe usually belongs to whoever looted it first. Players who specifically hunt the key in caches should accept that the cache route is a bonus route, not a primary route, and plan the raid around the rest of the map while keeping an eye out for the key as a side benefit.
Source 3: player-to-player trade and stash inheritance
Some group sizes and pre-raid lobbies allow key trades between squadmates before the drop. Squads that pre-coordinate which member holds the key before queuing reduce the number of players who need to learn the route. Stash inheritance rules vary, so check the current patch notes before relying on a key surviving a death in a previous raid.
The trade rules also interact with the kit the key is being placed into. A key handed to a player whose loadout is already at 90 percent carry capacity will be carried in a slot that displaces a component, an ammo stack, or a healing item, and the squad is then forced to make a smaller payout on the rest of the run. Trios that rotate the key through a designated “key carrier” role, with a kit built around holding the key and a single mid-tier weapon, tend to lose less value to displacement than trios that pass the key to whoever is standing closest to the vendor.
Quick comparison of key sources
| Source | Reliability | Cost or effort | Risk to acquire | Best use |
|---|---|---|---|---|
| Vendor rotation | High when in stock | In-raid currency | Low, occurs pre-raid | Planned runs with a full squad |
| Field cache drop | Low to medium | Time spent looting | Medium, requires staying in the upper tiers | Solo or duo opportunists |
| Pre-raid trade | Depends on group | Requires a coordinated squad | None if the squad is trusted | Squads running a set route |
How to plan a Dam key run
A run that starts with the key already in the bag is faster and quieter than a run that hopes to find one. The plan below assumes the squad is queuing specifically to use the key, not to clear the entire map. The distinction matters because a “use the key” run treats every other container on the route as optional, while a “clear the map” run treats the key as one of many objectives. Squads that try to do both usually end up doing neither well.
Step 1: Pre-raid setup
- Check the vendor rotation for the current server tick and buy the key if it is in stock.
- Confirm the squad’s roles: one entry player, one overwatch, one scout, and a flex slot for the third member if running a trio.
- Stagger loadouts. The overwatch should bring a long-range weapon suited to bridge sight lines, the entry player a close-to-mid weapon, and the scout a sidearm plus a small med kit.
- Decide on a primary extract point before queuing. The map has multiple extracts and the surveillance room is far from the default landing zone, so the extract decision is part of the route rather than an afterthought.
Pre-raid setup is also where the squad should agree on the abort conditions. The most useful abort condition is “any squad member at 50 percent health or below before we reach the door,” because a low-health key carrier is one bad interaction away from losing the run. Agreeing on this in the lobby is faster than working it out in the corridor outside the door, and it is the kind of small piece of planning that separates a key run that produces a payout from a key run that ends with a recall.
Step 2: Landing and approach
Drop at a point that gives the squad cover on the way to the upper tier without landing directly on the surveillance room door. Landing on the door is a frequent mistake because any squad already on the upper tier can pre-aim the corridor. The safer choice is a maintenance yard landing that lets the squad climb a stairwell in cover and approach the door from the catwalk side.
The approach through the maintenance yard also lets the squad listen for late-raid activity. The yard’s central courtyard is a natural gathering point for squads that have finished their own objectives and are now hunting other players on the way to extract. A squad that moves through the yard quickly and quietly can hear a hunting squad before the hunting squad hears them, which is the only reliable way to avoid the most common late-raid fight on this map.
Step 3: Opening the room
Only the player holding the key can interact with the door. The interaction takes a few seconds, during which the player is stationary, so the rest of the squad should be set up on overwatch positions before the key is used. Loot the room in a fixed order: first the wall-mounted cases, then the floor containers, then the desk drawers. The fixed loot table means there is no reason to leave a container unchecked.
The interaction also has a short audio cue that the door panel emits when the key is accepted, and that cue carries further than the squad expects. Once the key is in the reader, any other squad on the upper tier has about a second of warning that a door has been opened in the surveillance wing. That is enough time for a well-placed overwatch squad to start rotating. The squad should plan to be out of the corridor within a few seconds of the cue, not within a few seconds of finishing the loot.
Step 4: Extract decision
| Option | When to choose it | Risk |
|---|---|---|
| Fast extract, skip the rest of the map | The key holder is low on health, ammo, or the squad has been spotted | Leaves other high-value containers on the table |
| Continue clearing upper tier | The squad still has ammo, the timer is comfortable, and the rest of the map is quiet | Longer exposure to late-raid squads coming up from the spillway |
| Drop down to maintenance yard, then extract | The squad is carrying other high-value loot and wants to avoid the central bridges | Requires a known safe path through the lower levels |
The extract decision is also where the squad’s information discipline matters. The key carrier should call out which extract the squad is taking as soon as the room is cleared, not as the squad is leaving the corridor. Late calls on extract are a common source of squads that split up on the way out, and a split squad in the maintenance yard is a much easier target than a stacked squad on the bridges. Pick the extract before the room is opened, confirm it again as the squad leaves, and move to the chosen point without further discussion.
What is inside the surveillance room
The room’s loot table is fixed, which makes the run repeatable. Players who run the key on a weekly basis can plan their crafting and barter targets around the contents rather than gambling on a randomized drop. The fixed table is also why two players who have both run the key can compare payouts and agree on whether a run was worth the effort, instead of comparing randomized outcomes that have no relationship to each other.
Confirmed item categories
- Mid-tier weapons and attachments: enough to outfit a freshly lost kit or to barter at a field vendor.
- High-value components used in the mid-game crafting tree, including the alloy and circuitry parts that are otherwise slow to accumulate.
- Ammo caches for the common calibers, useful for resupplying the squad before a continued clear.
- A small chance of a cosmetic or vanity item that some players collect for the hideout.
Players who run the key often notice that the room’s payout scales with the squad’s actual needs in ways the loot table does not formally document. A squad that is short on components tends to find more components, and a squad that is short on ammo tends to find more ammo, which is either a quiet design feature or a small-sample coincidence. Either way, the room pays out more useful value to a squad that has identified its own shortage before opening the door.
Loot priority by role
The order in which the squad loots the room should be set before the door is opened. A useful default order is:
- Entry player takes attachments that improve the kit they brought in.
- Overwatch takes ammo for the weapon they are holding and any mid-tier weapon they want to swap to.
- Scout takes components for the next crafting queue, since they usually leave the raid with the lowest carry weight.
- Flex slot takes whatever is left, prioritizing barter value over personal fit.
Roles can also be reassigned on the fly if the original entry player is the one who took damage on the approach. The only rule that does not change is that the key carrier should not be the same player who is sorting the wall cases, because holding the key while crouched in front of a container is a slow way to lose the run to a flanking squad. Once the door is open, the key is consumed and the carrier is just another looter; the role of “key carrier” ends at the door, and the role of “looter” begins.
Common failure modes and how to avoid them
The dam surveillance key is a map-key item that binds to the Dam location on ARC Raiders, one of the larger industrial sites in the rotation. It is not a quest token, it does not stack, and it is consumed on use, so the room it opens is the only payout. Because Dam is a contested extraction map with long sight lines and multiple choke points, the key has more value as a route-planning tool than as a standalone collectible. The rest of this article walks through the practical questions a squad has when one of these keys shows up in the stash.
Most failed dam surveillance key runs are not lost because of bad luck. They are lost because the squad repeats one of a small set of mistakes that are easy to see in hindsight. The list below is the same list that experienced players cite in post-raid reviews, in roughly the same order, because the failures cluster in the same way every patch.
Failure 1: Holding the key in the wrong kit
Players who carry the key in a kit that is too valuable to risk on the upper tier tend to camp the lower levels and never use the key. The kit holding the key should be a mid-value, expendable loadout, because the upper tier is where the fights happen. A high-value kit holding the key is a sunk cost the moment the squad spawns in.
Failure 2: Approaching from the bridge
The central bridges offer the fastest path to the upper tier and the worst cover. A squad that crosses a bridge in the open while holding the key is asking to be shot by any overwatch already set up on the catwalks. The maintenance stairwell is slower but keeps the squad under cover for most of the climb.
Failure 3: Opening the door before overwatch is set
The door interaction is a stationary animation. A squad that opens the door while still moving into position is giving away the timing of the loot. Set up overwatch first, then open the door.
Failure 4: Looting the room in random order
Looting in random order is slower than looting in the fixed order above, and on the Dam map every second of extra exposure matters. A squad that has run the room a few times can clear it in well under a minute.
Failure 5: Extracting from the wrong point
The default extract is rarely the best extract after a key run, because the default extract is the one most other squads are watching. Map knowledge of the secondary extracts is part of the value of running the key more than once.
There is also a sixth failure that does not fit cleanly into the list above but is worth naming on its own: forgetting the key. Players who spend the pre-raid lobby discussing loadouts and roles sometimes queue into the map without confirming that the key is actually in the carry slot. The map does not warn the player that the key is missing, and the surveillance room door will simply refuse to open with no on-screen explanation. The fix is mechanical rather than strategic: check the key’s slot in the deploy screen before confirming the drop, every time, regardless of how confident the squad is that the key was bought.
Squad composition considerations
The key run works in solos, duos, and trios, but the optimal composition changes. The table below summarizes what each group size should bring and what trade-off each one accepts.
| Group size | Optimal roles | Strength | Main trade-off |
|---|---|---|---|
| Solo | Single loadout, stealth-first | No squad coordination overhead, fast clear of empty servers | No overwatch, so the key holder is exposed during the door interaction |
| Duo | Entry plus overwatch | One person can hold the key and one can cover the corridor | No scout, so the squad has less warning of flanking squads |
| Trio | Entry, overwatch, scout | Full coverage, easiest room clear | More loot to split, more time spent in the raid |
The trio row deserves a caveat that the table does not show. Running a trio is the most comfortable composition for a key run, but it is also the most visible composition on the map. Three players make more noise on stairs, leave more footprints in dust, and have a higher chance of being spotted by an overwatch squad that would have ignored a solo runner. Trios that want the comfort of full coverage should also accept that the upper tier is more likely to be contested when they reach it, and plan for a longer fight at the door as a result.
How the key interacts with the rest of the Dam loot economy
The key is one of several Dam-specific access items, and understanding how it sits in the broader loot economy is the difference between treating it as a one-off and treating it as a regular part of a weekly route. The economy around the Dam map is one of the more stable in the rotation because the map’s loot density rewards repeated play, and the dam surveillance key is the anchor that most players use to plan that repetition.
The key as a route anchor
Players who run the same Dam key on rotation usually build a fixed route that hits two or three other high-value containers in the same raid. The surveillance room is the anchor because it has a guaranteed payout, and the surrounding containers are the variable upside. Building the route around the anchor, rather than the other way around, keeps the run profitable even on raids where the surrounding containers are dry.
Barter and crafting interactions
The components inside the surveillance room feed into the mid-game crafting tree that most players need to keep their kits competitive. A squad that runs the key on a regular cadence has a steadier supply of those components than a squad that relies on randomized field drops, which translates into fewer forced purchases at the vendor and more freedom to spend currency on the next key.
Why the key is not worth stockpiling
The key is consumed on use and the contents of the room do not scale with the number of keys held, so there is no benefit to holding multiple keys in the stash. A single key in circulation, used on a planned schedule, produces more value than three keys sitting in a bag waiting for the perfect raid. The stash also has a limited number of consumable slots, and keys held in reserve take slots that could be holding components or ammo that the squad is actually going to use that night.
Patch sensitivity and current state
Because the key is a single-purpose access item, any patch that changes the Dam map, the loot tables, or the vendor rotation can move the key’s value up or down. The sections below summarize what to check on the patch notes before committing a run. The check is short, but skipping it is the most common reason a squad walks into a Dam run on a day when the key has been temporarily removed from the rotation, and the raid becomes an ordinary upper-tier clear that the squad did not actually need to do.
Map changes to watch for
- New chokepoints that change the optimal approach to the surveillance room.
- Adjusted spawn density on the upper tier, which changes the overwatch setup time.
- New extract points or changes to existing ones, which change the extract decision after the room is cleared.
Loot table changes to watch for
- Component balance shifts that change the room’s value relative to other Dam containers.
- New attachment types added to the fixed table, which change the loadout planning step.
- Removal of the cosmetic drop, which usually reduces the room’s value for collectors but not for crafters.
Vendor rotation rules to confirm
- Whether the key is on the rotating stock list for the current patch.
- Whether the key is sold individually or only as part of a Dam bundle.
- Whether the vendor refresh timer is server-wide or per player, which changes the urgency of buying as soon as it is in stock.
Working with the rest of the raid preparation workflow
For studios and producers reading this who are studying the design pattern behind single-use map keys, the surveillance key is a useful case study in tying a consumable to a fixed payout. The mechanic rewards route planning and squad coordination more than mechanical aim, which is why the key has a stable place in the meta even though the contents of the room are not the highest-value loot in the game. Teams building their own extraction loops can learn from how the key interacts with the surrounding loot economy, and the broader production context for that kind of decision sits inside the larger discussion of how a video game development process turns a mechanic like a single-use access item into a repeatable content loop. Studios that are still scoping the surrounding systems often find it useful to map those loops back to the team structure that owns each layer of the design, because the production ownership of a key, a room, and a vendor rotation rarely sits with the same person.
There is also a documentation lesson in how the key is described. The in-game tooltip is generic on purpose: the design team has chosen not to teach new players the route in the item description, which forces players to either learn the route from squadmates or skip the key entirely. That choice is consistent with how ARC Raiders treats other map-specific access items, and it is one of the reasons the dam surveillance key retains a steady player base without becoming mandatory for casual runs. A consumable that the game refuses to explain is a consumable that only the engaged audience will use, which is exactly the audience the design is built around.
Practical checklist for the next run
- Confirm the key is in the stash and the kit holding it is expendable.
- Set the loadouts and overwatch positions before queuing.
- Land at the maintenance yard and take the stairwell, not the bridge.
- Set overwatch before opening the door.
- Loot the room in the fixed order.
- Decide on the extract point before leaving the room.
- After extract, note what worked and what did not, and update the route for the next run.
Frequently asked questions
What is the dam surveillance key used for in ARC Raiders?
It opens the locked surveillance control room on the upper tier of the Dam map. The door cannot be picked or destroyed, so the key is the only way in. The room has a fixed loot table rather than a randomized drop.
Where do I get the dam surveillance key?
The key comes from the rotating in-raid vendor, from specific field caches on the upper tier of the Dam map, or from pre-raid trades with squadmates. The vendor is the most reliable source when the key is in stock.
Can the key be used more than once?
No. The key is consumed on the door interaction, and a second key is required for a second room clear. There is no benefit to holding multiple keys in the stash.
Is the surveillance room worth running solo?
It can be, especially on quieter servers. Solo players should approach from the maintenance stairwell, set a defensive position inside the room, and accept that there is no overwatch during the door interaction.
What is the best loadout for a key run?
A mid-value expendable kit is the safest choice. The overwatch should bring a long-range weapon suited to bridge sight lines, the entry player a close-to-mid weapon, and the scout a sidearm plus a small med kit.
Which extract should I use after opening the room?
There is no single correct answer. Use the fast extract if the squad is low on resources, the maintenance yard extract if the squad is carrying other high-value loot, or the upper tier extract if the rest of the map is still quiet and the timer is comfortable.
Does the dam surveillance key work on other maps?
No. The key is bound to the Dam map and only opens the surveillance room door. Other locked rooms in the rotation have their own dedicated keys.
Is the dam surveillance key tradeable?
Pre-raid squad trades are allowed in most group sizes. Whether a key survives a death in a previous raid depends on the current patch’s stash inheritance rules, which should be checked on the latest patch notes before relying on it.
What is the most common reason a key run fails?
Approaching the upper tier through the central bridges in the open. The bridges are the fastest path and the worst cover, and a squad carrying the key across a bridge is the most common way to lose both the key and the raid.
How often should I run the key?
On the cadence that matches the vendor rotation and the squad’s supply of expendable kits. A weekly run is a reasonable default for a trio, and a twice-weekly run makes sense during events that boost the room’s loot value.