CatNap in Poppy Playtime: how a sleeper mascot became a production benchmark
CatNap arrived in Poppy Playtime as the defining antagonist for Chapter 3, and the character immediately reset what players expected from a toy mascot in a horror setting. The more useful question for a development reader is not whether the figure is scary. It is how a single design can carry scene lighting, animation, narrative tone, and audio direction without breaking the small-team pipeline that defines each chapter Mob Entertainment ships. CatNap is now a recurring reference point in horror mascot design, in constrained animation budgets, and in staging that has to respect both narrative beats and the limits of real-time rendering on modest hardware.
This article treats the character as a production artifact. It walks through the design intent, the rigging and animation approach that the visible performance suggests, the lighting and rendering choices that keep the silhouette legible, and the audio and narrative decisions that turn a static toy into a long-form antagonist. It also extracts the production lessons a small studio can apply to a similar mascot-driven chapter, with explicit attention to scope, validation, and the trade-offs that show up when a character has to work across cutscenes, chase sequences, and puzzle rooms in the same engine build.
What CatNap is in Poppy Playtime
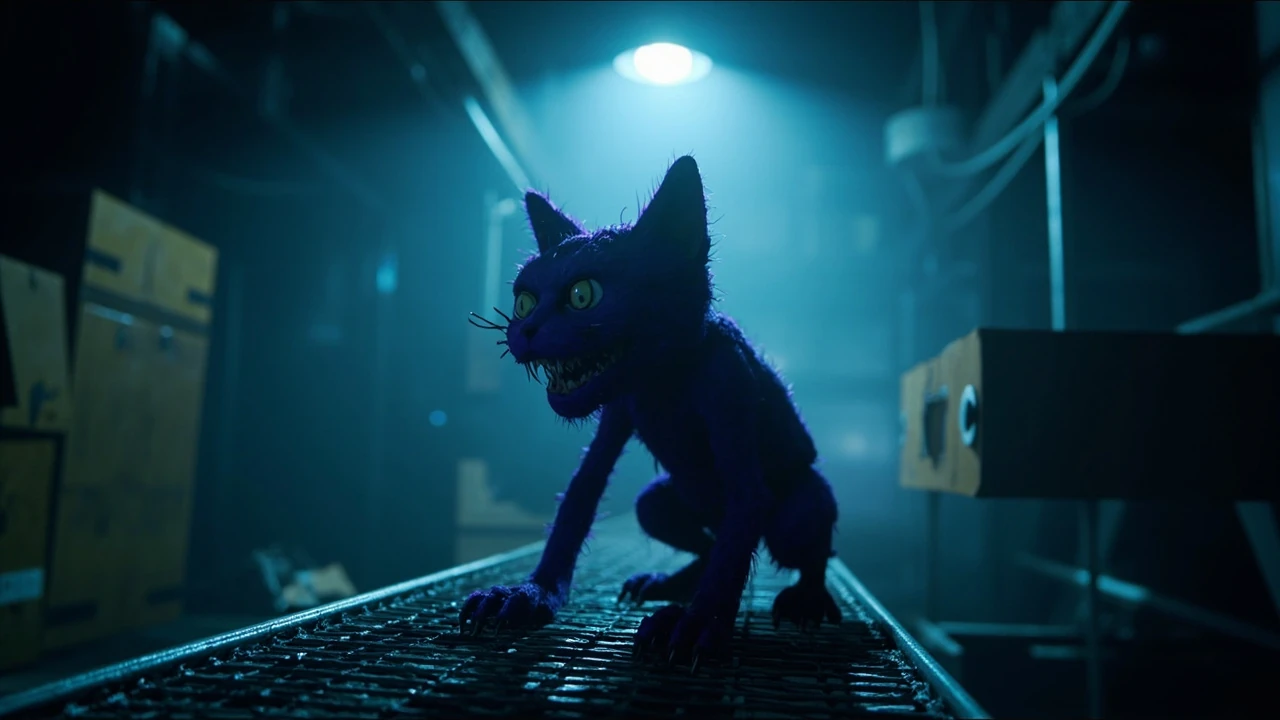
CatNap, sometimes referred to in production notes and community discussion as the closest companion of The Prototype among the Smiling Critters, is a large, purple, bipedal cat figure with elongated limbs, a soft toy texture, and a gas-mask-like face plate. The character functions as the primary antagonist of Poppy Playtime Chapter 3: Deep Sleep, which centers on the Playcare orphanages and a sleep-themed villain cycle. From a design perspective, CatNap occupies a specific niche: a horror mascot that has to read as both comforting and threatening, with body language that signals slow, deliberate pursuit instead of frantic chase behavior.
From a production standpoint, the character has to exist in three states across a single chapter: a passive presence the player glimpses from a distance, an active threat that animates on a reduced frame budget, and a narrative reveal in which the rigging and lighting pipeline has to support a long, partially scripted sequence without obvious seams. Each of those states drives a different decision in the asset and a different acceptance test for the team.
Design intent and silhouette
Horror mascots succeed or fail on silhouette. CatNap’s design solves three silhouette problems at once. The head is large and round, the torso is comparatively short, and the limbs are extended to almost puppet-like proportions. The result is a shape that remains readable at low brightness, at distance, and through volumetric haze, all of which are common in the deeper rooms of the Playcare chapter. The character does not need a high-resolution texture to be threatening; the outline already communicates scale, posture, and intent.
The face plate further separates this design from a generic toy horror approach. The gas-mask motif creates two reading layers at once: a manufactured object that a child could plausibly wear, and an apparatus associated with chemical or environmental threat. That duality gives the animation team a justification for stiff, deliberate head movement without breaking the natural toy metaphor. Teams building similar mascots should treat the face plate as a rigging decision as much as an art decision, because it controls how much facial expression the player ever sees.
Soft toy texture is the third anchor. The visible fabric and stitching cues signal that this is a creature the player has been told to trust inside the fiction. The animation team can use that texture as a budget saver: cloth simulation on the ears, tail, and torso can replace a fraction of the body animation work while still producing a sense of life that a perfectly rigid mesh would not deliver. The audience reads the soft elements as breath and movement even when the underlying skeleton is barely changing pose.
Animation approach and rig complexity
The visible performance of CatNap in Chapter 3 suggests a rig that prioritizes upper-body expressiveness, a constrained lower-body set, and heavy reliance on root motion for the slow walk cycle. The character rarely performs athletic motion; instead, the rig is built for long holds, slow turns, and short lunges. For a small team, that scope decision is more important than any specific tool. The rig does not need to support parkour, sprint blending, or complex traversal, which keeps the skinning pass and the weight-painting iteration cost within reach of a chapter-sized team.
A practical rig breakdown for a similar character, based on what the on-screen performance implies, looks roughly like the table below. The numbers are illustrative production ranges for a single hero character on a chapter-sized project, not measurements from a specific tool or vendor.
| Rig subsystem | Typical scope | Reason for the scope | Validation check |
|---|---|---|---|
| Spine and neck | 3-5 controls, 2 IK/FK switches | Supports slow turns, head tilts, and reveal poses | Play a 30-second hold cycle, verify no skin pops at the neck seam |
| Arms and claws | FK with IK target on each hand | Reaching and grabbing in puzzle rooms and chase beats | Animate three reach distances, check elbow twist |
| Legs and feet | IK with planted-foot cycle | Walking on catwalks, ladders, and uneven Playcare geometry | Step along a curved path, verify no foot sliding |
| Face plate | Limited blend shapes, fixed gaze | Mask design reduces facial animation needs | Render reveal shot, confirm gaze reads at the framing distance |
| Tail and ears | Cloth or spring simulation | Substitutes for body motion in long holds | Capture a 5-second idle, check rest pose return |
| Root motion | In-place clips with locomotion baked | Keeps level design authority over pathing | Drop the AI on three navmesh slopes, verify stride matches speed |
Two rigging decisions matter most for CatNap-style characters. The first is to treat the face plate as a separate submesh with its own material slot, because the studio may want to swap the mask design during prototyping without re-rigging the body. The second is to author every clip with an explicit frame-0 and frame-last T-pose variant, even if the engine does not strictly require them. That habit saves hours when the chase scene needs a retargeted clip because the level designer extended the corridor, or when a new platform build changes the import settings.
Weight painting is the third area where a small team can quietly lose a week. CatNap’s silhouette relies on clean edges along the shoulders, the tail base, and the jaw. The team should budget a dedicated weight pass for those zones after the first animation cycle, not as part of the initial skinning. The cost is small and the visual gain is large, because the silhouette is what the player reads first in a dark room.
Lighting and rendering choices that make the character work
CatNap is staged almost entirely in low-light, high-contrast environments. The Playcare chapter uses practical lamps, scattered nightlights, and intermittent red emergency lighting rather than bright key lights. That staging decision drives two render-time choices a small team can still execute well: a relatively low base lighting pass with selective spotlights, and a careful reliance on rim light to separate the silhouette from the dark background. The dark-purple material of the character reads clearly only when the rim light has a color the post-process pipeline does not crush.
A second rendering decision is reliance on volumetric haze. The character emerges from a fog volume in several scripted moments, and the team can use the same volume to mask seams between in-engine animation and pre-rendered sequences. For a small studio, this is one of the cheapest ways to protect visual continuity. The volume also reduces the cost of long-distance silhouette reads, because the renderer can rely on the haze to simplify the environment without losing the sense of scale.
For teams planning similar scenes, the lighting checklist below is a reasonable starting point. The list is not a substitute for per-project validation, but it captures the decisions that a CatNap-style scene usually exposes.
- Confirm the hero material holds its hue under a 1,500 to 3,500 Kelvin practical light.
- Verify rim light placement against the dominant camera angles used in the chapter.
- Use a single volumetric volume per major room to control reveal timing.
- Lock the post-process exposure curve before animating chase beats.
- Reserve one emergency red light per zone as a narrative cue rather than as a generic accent.
- Test the silhouette in a grayscale pass before adding color grading.
A third choice worth flagging is shadow budget. CatNap’s rig is heavy in long holds, which means the character’s shadow on the floor and on the wall is on screen for extended periods. A small team can keep the shadow map resolution low without losing the scene, but the team has to commit to that budget early. Late changes to shadow resolution tend to break previously approved lighting passes, because every practical lamp has to be rebalanced against the new shadow range.
Audio direction and the role of silence
CatNap’s most quoted production trait is the audio restraint around the character. The team uses long silences, low drones, and a recurring musical motif tied to the Poppy Playtime nursery rhyme thread. The audio approach is part of the design, not decoration. The character becomes more threatening in the moments when the soundtrack pulls back, which means the audio middleware, the AI cue system, and the animation system have to agree on when the silence begins. A small team that does not plan this agreement will end up with chase scenes that feel busy because every system is trying to contribute at once.
For a comparable chapter, three audio decisions are usually decisive. First, author a dedicated low-priority drone bus for antagonist presence and keep it always routed, with volume curves driven by distance rather than by event triggers. Second, gate the nursery rhyme motif to specific in-world triggers, such as player interaction with a toy or entry into a scripted room, so the player can predict the cue and the team can use it as a pacing tool. Third, leave silence as a legitimate state in the AI state machine, with no ambient bed filling the gaps; the absence of sound is part of the character.
Implementation matters as much as intent. The drone bus should be mixed with a sidechain that ducks under any dialogue or player-triggered sound, so the antagonist presence never competes with the player’s own actions. The motif should be authored as a stem, not as a fully mixed loop, so the audio team can adjust the instrumentation per room. The silence state should be enforced at the state-machine level, with an explicit minimum duration before any other cue is allowed to fire.
AI and gameplay integration
The CatNap encounter is built around a small number of AI behaviors that combine into a longer scene. The visible behaviors include passive patrol, slow pursuit after a defined trigger, scripted corridor appearances, and a final sequence that shifts the encounter from a chase to a puzzle. For a small team, the key constraint is that each behavior has to be testable in isolation. Designers should be able to drop a debug command that forces any one of the behaviors to fire, so that QA can validate animation transitions, audio cues, and lighting without a full play-through.
One pattern that fits this kind of antagonist is a state machine with a small number of states and a clear event log. The table below summarizes a working pattern that a chapter-sized team can implement in a standard behavior tree or state machine without needing a custom toolset.
| State | Player input trigger | Antagonist response | Audio cue | Lighting cue |
|---|---|---|---|---|
| Dormant | Player not in zone | Idle pose, no locomotion | Quiet room tone | Practical lights only |
| Stalk | Player enters a corridor | Root motion walk behind cover | Low drone fades in | Rim light increases |
| Pursuit | Player breaks line of sight or triggers a sensor | Increased walk speed, head tracking | Drone swells, single bell toll | Red emergency light pulses |
| Reveal | Scripted trigger in the orphanage hall | Full-body turn, fixed gaze on player | Musical motif enters | Volumetric haze rises |
| Yield | Puzzle solved or retreat reached | Slow step back, hands lower | Motif trails off, drone remains | Practical lights return |
The pattern above is deliberately small. Each state has a clear audio and lighting counterpart, which means a producer can review the scene by reading the table without watching the full animation pass. That kind of compact specification is one of the most underused tools in chapter-scale production, because it converts subjective reviews into concrete line items.
Pathfinding also has to match the animation budget. CatNap does not sprint, which means the navigation mesh can be coarser than it would be for a runner enemy. The team can use simplified navmesh tiles around the Playcare corridors, reduce the agent radius to match the wider silhouette, and rely on the root motion clips to handle the actual walking speed. The chase sequence then becomes a state transition problem rather than a pathfinding problem, which is cheaper to debug.
Narrative role inside Chapter 3
CatNap exists inside a narrative frame that ties the Poppy Playtime toy line to the orphanage experiments inside Playcare. The character is the visible face of the deeper experiment, the antagonist that the player has to understand before the chapter can resolve. From a production perspective, the narrative role changes three things about the asset. First, the character has to be readable from a distance in low light, because the player is often introduced to the figure through framing rather than through dialogue. Second, the animation team has to support at least one long reveal sequence in which the camera dwells on the character, which is a different optimization target than a chase. Third, the audio and writing teams need a short, consistent vocabulary for the character that the writing can refer to without over-explaining the lore.
A practical narrative checklist for a similar mascot antagonist looks like this:
- Define one physical tic the character repeats in every state, such as a head tilt or a single slow breath.
- Lock one musical phrase that introduces the character, and reuse it sparingly.
- Write two short environmental logs that reference the character by its in-world name rather than by a generic term.
- Plan a single reveal sequence in which the camera holds on the character for at least six seconds.
- Decide the moment the character exits the scene before the team begins animating chase beats.
- Confirm the character’s relationship to the chapter’s central mystery in a single paragraph before writers expand the script.
The last item is the one teams tend to skip. A mascot antagonist works harder when the player can name the threat and explain it in one sentence. The narrative team should be able to write that sentence on a sticky note and stick it to the wall above the animation workstation. If the sentence grows past one line, the chapter has probably introduced too much lore for a single figure to carry.
Production lessons for a small horror team
The CatNap case is useful because it is achievable. The character is one hero asset, the chapter is roughly the size of a short commercial release, and the technical decisions are within reach of a team that already has a working engine pipeline. The lessons below are framed as production choices rather than art preferences, because the more common failure mode on a small horror project is inconsistent production decisions across the chapter, not bad art in isolation.
Constrain the rig before you constrain the art
The most expensive change on a mascot character is the rig, because every animation, every AI behavior, and every interaction is downstream of it. A team that locks the rig’s control count, IK/FK switches, and blend shape budget before final art freezes the scope. A team that lets the rig grow to match the art will end up with animation and AI work that cannot be reused when the chapter’s geometry changes or when the character has to be reimported into a new engine build. A short rig specification, written in plain text and signed off by the lead animator, is one of the cheapest documents a small studio can produce.
Treat the lighting state as a deliverable, not a polish step
CatNap-style scenes depend on the lighting to sell the silhouette and the pacing. The lighting state is therefore a deliverable in its own right, with a written exposure curve, a fixed practical lamp set, and a clear red emergency cue. The team should validate the lighting with the character’s actual material in the actual room, not with a stand-in mesh, before the animation pass is complete. Lighting that looks right with a primitive mesh tends to break when the real material, with its normal map and subsurface shading, is dropped in.
Author audio against states, not against scenes
When audio is authored against AI states, the same character works in any room and the team can change the level design without rewriting the audio cues. When audio is authored against scenes, every redesign triggers a new audio pass. The state-based model is also friendlier to localization, because the cue vocabulary stays short. A sound designer who can read the state list and pick the right cue from a library is a much cheaper resource than a sound designer who has to be present for every level design change.
Plan the reveal before the chase
Small horror teams often invest most of their animation budget in the chase sequence and leave the reveal underweight. The reverse is usually better. A strong reveal is short, requires limited animation, and depends on lighting, framing, and audio. The chase sequence then inherits the reveal’s vocabulary and feels consistent. The reveal is also where the player’s first impression is set, and first impressions tend to drive the rest of the chapter’s reception in player feedback.
Keep the asset budget honest
CatNap is one character on one chapter. A team that tries to ship a comparable chapter with five hero-quality antagonists will discover that the rig, animation, lighting, and audio work scales linearly with the number of heroes, not with the number of enemies. The honest answer is usually two hero-quality characters and the rest of the chapter carried by environment and audio. That budget also leaves room for a future chapter, because the supporting cast can be promoted to hero quality once the pipeline has been validated on the first character.
Document the state list in plain text
A state list that lives in a shared document, with the same column headings used by animation, lighting, audio, and AI, is the single most useful artifact a small team can produce. The cost is a few hours of writing. The benefit is that every discipline reads from the same source, every review can be done against the document, and every late change can be traced back to a specific state. Teams that skip this step tend to discover, late in production, that animation, lighting, and audio have drifted apart and need a costly reconciliation pass.
Comparison with adjacent horror mascots
CatNap is not the only horror mascot in the contemporary indie space, and a useful production comparison clarifies what makes the design work. The table below compares the character with three commonly cited adjacent designs. The scores are editorial assessments based on visible design, animation, and staging choices, not benchmarked measurements.
| Character | Silhouette readability in low light | Rig complexity for the visible performance | Audio restraint as a design tool | Number of distinct AI states |
|---|---|---|---|---|
| CatNap (Poppy Playtime) | High | Medium | High | 5 |
| Mascot A (generic indie horror) | Medium | Low | Medium | 3 |
| Mascot B (animatronic-style) | High | High | Low | 4 |
| Mascot C (faceless pursuer) | Medium | Low | Medium | 2 |
CatNap’s combination of high silhouette readability, medium rig complexity, and high audio restraint is unusual. Most mascots lean on either a complex rig or a heavy audio design, not both at moderate cost. The trade-off is that the visual variety of any single state is low. The team compensates through lighting, framing, and pacing rather than through additional animation, which is the right call for a small studio. The comparison also shows why a faceless pursuer, while cheaper to build, tends to produce shallower player feedback: the design carries less to react to in any given frame.
For a team choosing a direction, the table suggests a few editorial rules of thumb. If the rig budget is small, invest in silhouette and audio restraint rather than in animation variety. If the audio budget is small, invest in rig and staging rather than in musical motifs. If both are small, the mascot design is probably the wrong starting point and the chapter should be built around environment and puzzle tension instead.
How a team can reproduce the production pattern
A team that wants to apply the CatNap pattern to a similar chapter does not need to copy the character. The pattern is independent of the art and depends on five repeatable decisions. The list below is a working sequence, not a recipe. Each item is something the team should agree on in writing before the chapter goes into full production.
- Lock the rig scope in a single page, with explicit control counts and IK/FK switches.
- Write the lighting deliverable as a state list, not as a mood board.
- Author audio against the same state list, with explicit silence as a state.
- Build the AI behavior tree from the state list, with debug commands for every state.
- Plan the reveal sequence first, then the chase, then the supporting behaviors.
When the team uses the same vocabulary for rig, lighting, audio, and AI, the review process becomes faster and the chapter ships with fewer late changes. The cost is a small amount of writing time at the start of production, which is cheaper than the same time spent in late iteration. The pattern also travels well between chapters: once a team has written the state list for one character, the second character can reuse the same document structure with new entries.
Validation and acceptance testing for a CatNap-style chapter
Acceptance testing for a mascot-driven horror chapter needs a checklist that matches the state list, not a generic QA pass. The list below is a starting point, with the caveat that a real chapter will extend it with project-specific checks.
- Verify each AI state plays the correct animation clip on first entry and on return from another state.
- Confirm the lighting state changes within 0.5 seconds of the AI state change.
- Record the audio cue at the same instant as the AI state change and confirm the latency is under one frame at 30 fps.
- Walk the full reveal sequence in a build with the post-process chain disabled, and confirm the silhouette still reads.
- Run the chase sequence on the minimum target hardware and confirm a stable frame time across the full encounter.
- Capture the reveal sequence from a player camera and confirm the gaze direction matches the expected target.
- Repeat each check after every lighting pass and every animation revision, not only at the end of the chapter.
The order of these checks matters. The team should validate the visual readability first, because if the silhouette fails, no amount of animation polish will rescue the scene. The chase frame time is last because it depends on every earlier decision being correct. A team that runs the chase check before the lighting check often finds itself optimizing frame time on a scene that is about to be rebuilt.
Hardware targets are worth naming explicitly. A small horror chapter on PC and console usually has a minimum target spec that is two to three generations behind the recommended spec. The validation pass should run on the minimum spec hardware, not on the lead developer’s workstation, because the workstation will hide performance problems that show up on the actual target machine.
Risk areas and what to watch for
Three risks recur on CatNap-style chapters. The first is rig drift, in which the rig grows through the production cycle because new behaviors require new controls. The second is audio saturation, in which the silence is filled in late production because the team is uncomfortable with quiet scenes. The third is lighting inconsistency, in which the practical lamps and the red emergency cues drift between rooms because the lighting pass is not state-driven. Each of these risks is easier to prevent than to fix, and each becomes cheaper when the team is explicit about the state list.
For a small studio, the honest answer is that any one of these risks can consume a quarter of the chapter schedule if it is allowed to surface late. The state list is the cheapest mitigation available, because it turns an editorial discussion into a production artifact that the team can review. A team that catches rig drift in week two of production can address it in an afternoon; the same drift caught in week sixteen can cost a full month.
A fourth risk that is less obvious is documentation drift, in which the state list falls out of sync with the actual implementation. The mitigation is the same: a shared document, a single source of truth, and a short review at the end of each milestone to confirm the document still matches the build. Teams that skip the review often discover, near the end of the chapter, that the state list describes a character that no longer exists in the engine.
Frequently asked questions
What is CatNap in Poppy Playtime?
CatNap is a purple, bipedal cat figure from the Smiling Critters toy line who serves as the primary antagonist of Poppy Playtime Chapter 3: Deep Sleep. The character is associated with the Playcare orphanage and a sleep-themed villain cycle, and the design is built around a gas-mask-like face plate, a soft toy texture, and a slow, deliberate animation style.
Why is CatNap so effective as a horror antagonist?
The character combines a high-contrast silhouette with strong audio restraint, which lets the studio control when the player sees and hears the figure. The design also benefits from a clear narrative function inside Playcare, so the player has a reason to fear the character beyond the immediate threat. The result is a mascot that feels dangerous in any lighting condition and in any room geometry.
How does the CatNap rig differ from a typical humanoid rig?
The visible performance suggests a rig that prioritizes upper-body expressiveness, fixed gaze through the face plate, and a constrained lower body. The team can keep the rig within a chapter-sized budget by removing the locomotion complexity, by relying on root motion, and by treating the face plate as a separate submesh. The trade-off is reduced facial animation, which the design compensates for through lighting and audio.
What is the most useful lesson from CatNap for a small studio?
The most useful lesson is to treat the rig, lighting, audio, and AI as one state list, and to keep the same vocabulary across all four systems. A team that writes the state list once and reuses it for animation, lighting, audio, and behavior tree review can ship a coherent chapter with a smaller team and a shorter iteration cycle.
Can a small team reproduce the CatNap design without the same art budget?
Yes, because the production pattern is independent of the art. A team that locks the rig scope, writes the lighting as a state list, authors audio against the same states, and plans the reveal before the chase can reproduce the pattern with a simpler character. The cost saving comes from the production discipline, not from the art.
How does CatNap compare with animatronic-style horror mascots?
Animatronic-style mascots usually require a more complex rig because the visible joints must animate convincingly. CatNap’s design avoids that cost by relying on a soft toy texture, a face plate, and long holds, which means the rig can be simpler. The trade-off is that the visual variety of any single state is lower, so the team has to compensate through lighting and pacing.
What audio decisions matter most for a CatNap-style character?
Three decisions matter most. The team should keep a low-priority drone bus always routed, should gate the musical motif to specific in-world triggers, and should treat silence as a legitimate state. Together those three decisions make the character feel present without making the soundtrack feel busy.
What is the right way to plan a CatNap-style reveal sequence?
The reveal should be planned before the chase sequence, because the reveal depends on lighting, framing, and audio rather than on animation budget. A short reveal of six to ten seconds is usually enough if the lighting and the musical motif are aligned. The chase sequence then inherits the same vocabulary, which makes the chapter feel consistent.
Where can players find the official Poppy Playtime store page for Chapter 1?
Players looking for a stable reference page for the original release can consult the official Poppy Playtime Chapter 1 listing on the Xbox store, which includes the publisher information and the current platform support.