Core observer BL4: a focused look at the Blacklime Bunker drone
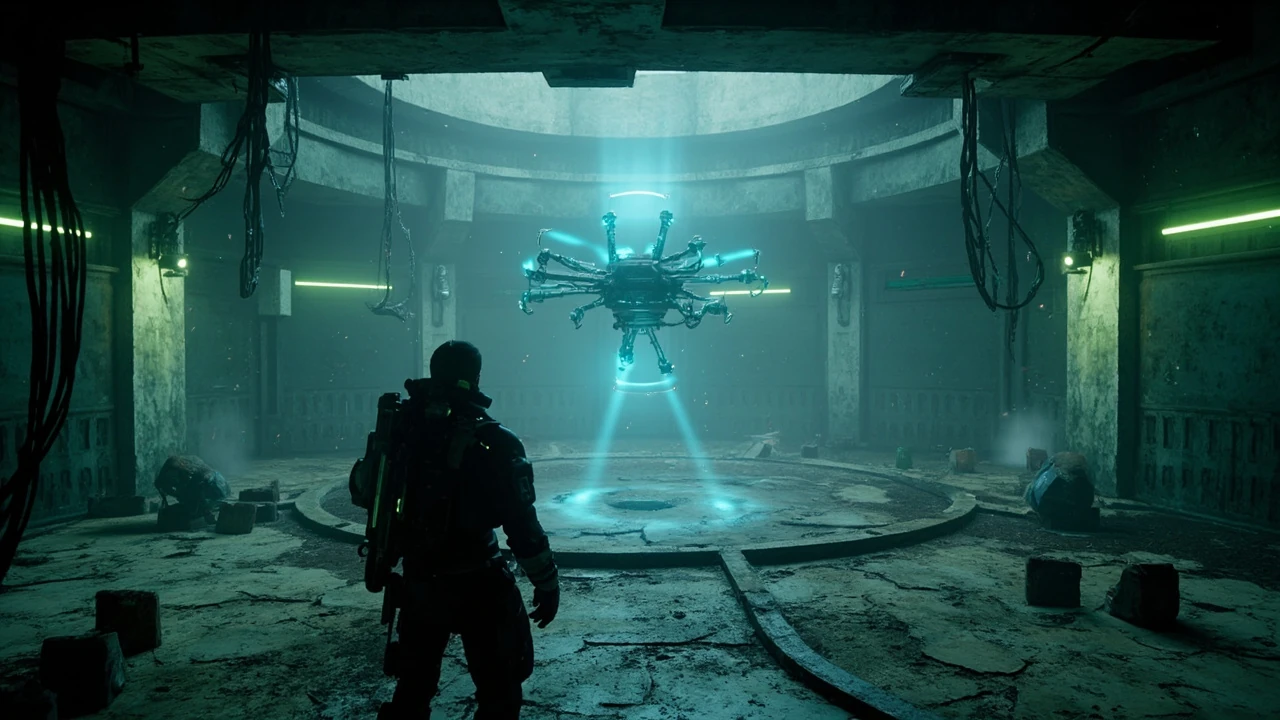
Borderlands 4 players exploring the Order bunkers in The Fadefields eventually reach a fight that feels more like an engineering exam than a typical shooter brawl. The core observer BL4 is a hovering drone boss inside the Blacklime Bunker, and it is built around three layered life bars, weak elemental types, and an arena that rewards disciplined movement over raw damage. For developers and designers reading along, it is also a useful case study in how the franchise structures mid-game boss encounters as mobile, cover-dependent puzzles rather than stationary bullet sponges.
This guide covers the verified location, the combat mechanics the design clearly telegraphs, the elemental matchups that change the time to kill, the legendary items the encounter is tuned to drop, and the production decisions that shape how a player is expected to approach the room. The details below lean on the official in-game structure of the Order bunkers, the broader Borderlands 4 boss system, and a single verified walkthrough reference. Where a mechanic is implied by the design rather than spelled out, the article marks it as a working interpretation, not a hard rule.
Where to find the core observer BL4
The core observer BL4 sits inside the Blacklime Bunker, one of several Order bunkers in The Fadefields region of Borderlands 4. The bunker is reached from The Howl, one of the provincial sub-areas of Fadefields, and the entrance sits on the north-east side of the nearby open world map. Players who cleared the surrounding story content will already have driven past the bunker entrance while chasing Order side objectives.
The pathing inside the bunker is intentionally linear. Designers use the bunker corridors to push the player toward a central arena without offering alternate routes, which mirrors the design pattern used by other Order bunkers in the region. Trash mobs along the way serve two purposes: they teach the player the visual language of Order enemies, and they drain resources so the boss fight is not trivialized by surplus ammo or full shield capacity entering the arena.
For practical navigation, the most efficient approach is to fast travel to Rootdown Estates and then run north-east to the bunker entrance. Once inside, follow the main corridor until the arena door opens. The arena itself is a wide circular room with low cover, overhead lighting, and a clearly marked entry ramp that doubles as a chokepoint. Players who need a moment to reassess their build can step back into the corridor before engaging.
Re-entering the fight: Moxxi’s Big Encore Machine
Just outside the arena, Moxxi’s Big Encore Machine lets the player respawn the core observer BL4 on demand. This vending machine is part of the franchise’s standard boss respawn toolkit and is placed close enough to the arena door that the entire loop is fast travel, run, die or clear, reset, repeat. For players farming specific drops, that short loop is the reason the fight is worth studying as a designer.
The machine is more than a convenience feature. From a production standpoint, it converts a one-time story encounter into a repeatable farm target with a controlled difficulty curve. The machine does not scale the boss to the player or change the loot table; it simply restarts the encounter from full health, which keeps the test consistent across runs and lets players benchmark changes to their build against a known target.
Core observer BL4 combat profile
The core observer is a flying drone. It does not use a humanoid moveset, does not perform melee combos, and does not retreat behind fixed phases. Instead, the encounter is built around the drone repositioning, the player repositioning, and a thin layer of cover used to reset health and shield values. Understanding that frame is the first step to reading the room correctly.
Three life bars define the encounter: 1 Shield, 1 Armor, 1 Shield. The shield-armor-shield layering is deliberate. The opening shield bar is meant to be burned down quickly with a strong damage spike, the armor bar is the longer, more methodical midpoint that defines the pacing of the fight, and the final shield bar is the burst phase that decides whether the player gets a clean clear or has to reset.
Elemental matchups: Shock and Corrosive
The drone is weak against Shock and Corrosive damage. Those two elements target the two different bar types in the layered life system, which is why a hybrid damage profile is more efficient than a single-element build. A pure Shock weapon chews through shield segments; a pure Corrosive weapon melts armor. A weapon, class mod, or grenade mod that contributes both elements shortens the fight noticeably.
| Element | Best target bar | Typical role in the fight |
|---|
Players who enter the room with a single-damage-type build should expect the armor phase to feel slow. Swapping in a Corrosive weapon for the middle bar is a cleaner solution than over-leveling the encounter, and it keeps the designer’s intended pacing intact.
Movement and positioning in the arena
The arena is wide, mostly flat, and dotted with low obstacles. There is no elevated cover, no destructible arena mechanic, and no environmental hazard. The intended strategy is to walk backward around the arena, keeping distance between the player and the drone, while strafing left or right to dodge direct attacks. The obstacles are short walls and crate stacks that the player can put between themselves and the boss to break line of sight when health or shield need to be restored.
- Walk backward in a slow arc to keep the drone at the edge of its engagement range.
- Strafe left or right when the drone commits to a direct attack to slip out of its firing cone.
- Drop behind a low obstacle when shields drop below half to allow shield recharge and any active regen skills to tick.
- Re-emerge as soon as health and shields recover to a workable threshold; the drone does not stay stationary.
Players who try to play the fight the way they play a humanoid boss in the same game will struggle. The drone’s profile rewards kiting and punishment windows over face-tank DPS races. That decision is part of the franchise’s general approach to mobile bosses, but the core observer BL4 leans harder into it than most stationary targets in the Order bunker set.
Why the arena is shaped the way it is
For developers, the arena is a teaching tool dressed up as a battleground. The combination of low obstacles, a circular floor, and a single entry ramp creates three useful conditions: the player always has cover within a few meters, the drone’s line of sight can be broken in many directions, and the respawn machine is always a short run away. The designers do not need to script a complex arena event because the room’s geometry already handles crowd control.
Several of the same design decisions are explored in the studio’s broader approach to taking a game from concept to release, where arena geometry is treated as a system rather than a backdrop. The Blacklime Bunker is one of the cleanest examples in Borderlands 4 of a room that quietly does a lot of design work.
Pre-fight checklist
Before stepping into the arena, a small set of checks makes the fight much more predictable. None of these steps are mandatory, but each one removes a common reason a run fails.
- Confirm the shield and armor types of the weapons in the active loadout. At least one weapon should deal Shock, and at least one should deal Corrosive.
- Check grenade and class mod rolls. Action skills that apply elemental status effects on hit can substitute for weapon elemental coverage.
- Empty the active backpack into the vault. The core observer BL4 can drop legendary items, and a full backpack interrupts the loot pickup state.
- Activate any map-wide buffs that are still on cooldown. Short-duration damage or shield buffs are worth spending before the door opens.
- Approach the arena and confirm the respawn machine is interactable, then step back into the arena corridor to start the fight on the player’s terms.
Legendary drops from the core observer BL4
The core observer is the dedicated loot source for a small set of legendary items. The exact item pool is documented in a comprehensive boss guide that lists the dedicated drops alongside their locations and weaknesses, and players should treat that page as the authoritative source for the live drop list because the pool is the kind of detail that changes with patches and seasonal updates. The reliable pattern, independent of any specific item, is that the encounter drops from a small dedicated pool rather than the generic legendary table, which makes the fight a focused farming target.
| Loot category | What to expect | Why it matters for the farm |
|---|---|---|
| Dedicated legendary pool | A short, named list of legendaries tied to the boss | Makes repeated clears a clean farm loop with consistent targets |
| World-drop legendaries | Standard high-rarity items from the regional table | Filler value when the dedicated drop does not land |
| Eridium and cash | Currency bundles scaled to the encounter’s tier | Useful for vendors and respec costs between runs |
Players chasing one specific weapon should plan for a meaningful number of clears, since dedicated drops do not guarantee the exact item on every run. Treat each clear as a chance at the full pool rather than a single roll, and the farm becomes a more pleasant loop.
Reading the fight like a designer
Three production decisions stand out when the core observer BL4 is read as a design object rather than a fight to clear. First, the shield-armor-shield layering turns a single health pool into a sequence of short, legible phases without using cutscenes or scripted invulnerability. Second, the elemental weakness map gives players a clear build direction without locking the encounter to one weapon type. Third, the placement of Moxxi’s Big Encore Machine converts the encounter into a repeatable test, which is a quiet but important decision for a loot-driven game.
For studios working on their own arena encounters, the fight is a useful reference for how a small set of rules can carry an entire room. There is no arena event, no adds phase, no mid-fight transformation, and no checkpoint reset. The encounter’s complexity comes from the layering of three life bars, two elemental matchups, and a generous arena with light cover, which is a strong argument for restraint in boss design. Studios weighing how to allocate content budget between encounter variety and encounter depth will recognize the trade-off.
Common failure modes and how to recover
Most failed runs come from one of three patterns, and each has a clean recovery step that does not require restarting the entire session.
- Stuck in the armor phase: the player is using the wrong elemental type for the middle bar. Swap to a Corrosive weapon or grenade, and the armor segment drops quickly.
- Out of cover during the final shield bar: the drone’s burst phase catches the player in the open. Break line of sight with a low obstacle and let shield regen tick before re-engaging.
- Backpack full of legendaries: the player cannot pick up new drops. Step out of the arena, visit the respawn machine, and bank items at the nearby storage before the next attempt.
None of these fixes require a higher-level character. They require reading the fight as it is designed, which is the underlying lesson the core observer BL4 quietly teaches the player on every run.
How the core observer BL4 fits the wider boss system
The core observer is one of several Order bunkers in The Fadefields, and it shares the franchise’s layered bar system with other bosses in the region. The interesting variation is the drone frame, which makes positioning the dominant skill rather than aim. Players who clear a humanoid Order boss in a nearby bunker will already understand the bar layering and elemental matchups, but they will need to relearn movement.
That shared language across bosses is one of the reasons Borderlands 4’s boss system feels coherent. Each new boss changes one axis (movement, cover, adds, or scripted events) while keeping the others stable. The discussion of roles and ownership inside a game development team is a useful mirror for that design: producers, level designers, encounter designers, and combat engineers each own one of those axes, and the boss reads well when their handoffs are clean.
Production takeaways for studios designing similar encounters
For teams building loot-driven action games, the core observer BL4 is a compact example of how a short encounter can still feel complete. The design pattern that emerges is consistent across the Order bunker set: a layered life system, a clearly signaled elemental weakness, a cover-friendly arena, and a respawn loop that supports farming. None of those decisions are exotic, but together they turn a five-minute fight into a system that supports the rest of the game.
The most replicable decision is the use of three life bars instead of a single health pool. Layered bars give players visible progress without scripting phases, and they let encounter designers tune difficulty per bar without touching the rest of the room. Combined with a tight elemental matchup map, that approach scales from early-game bunkers to the more demanding encounters later in the campaign without redesigning the underlying system.
Frequently asked questions
Where is the core observer BL4 located?
The core observer BL4 is inside the Blacklime Bunker, one of the Order bunkers in The Fadefields. Fast travel to the Rootdown Estates station and then run north-east to the bunker entrance. Follow the main corridor into the central arena.
Is the core observer BL4 part of the base game?
Yes. The core observer is a base-game boss encounter tied to the Blacklime Bunker, not a DLC boss. The arena and the respawn machine are accessible once the player has reached The Fadefields and unlocked the bunker entrance.
What elements work best against the core observer BL4?
Shock works well against the two shield segments, and Corrosive works well against the armor segment in the middle. Bringing both elemental types, or a class mod that contributes them, is the most efficient way to clear all three life bars.
How many life bars does the core observer have?
The core observer has three life bars: a shield bar, an armor bar, and a second shield bar. The opening and final shield bars reward burst damage, while the armor bar rewards a Corrosive-focused phase.
Can the core observer be farmed?
Yes. The respawn machine just outside the arena, known as Moxxi’s Big Encore Machine, lets the player restart the fight on demand. The encounter is tuned to a small dedicated loot pool, which makes it a clean farming target.
What legendary items does the core observer drop?
The core observer drops from a short dedicated legendary pool rather than the generic legendary table. The exact list of drops is maintained on the boss guide for the encounter, and players should check that page for the current pool, since item availability can shift with patches and updates.
What is the best strategy for the fight?
Walk backward in a slow arc to keep distance from the drone, strafe left or right to dodge direct attacks, and use the low obstacles in the arena as cover when health or shields need to recover. Use Shock weapons for the shield bars and Corrosive for the armor bar.
Do I need a specific character to clear the core observer BL4?
No single character is required. The fight is designed around elemental matchups, positioning, and cover use, so any character with a loadout that can deliver Shock and Corrosive damage will be able to clear it without unique class skills.
Can I reset the core observer BL4 without leaving the area?
Yes. Moxxi’s Big Encore Machine is placed just outside the arena and respawns the boss without requiring the player to fast travel or quit to the main menu.
What should I do if my backpack is full when the boss dies?
Step back through the arena door to the respawn machine area and bank items at the nearest storage before the next attempt. A full backpack interrupts the pickup state and can cause players to miss a drop even after a clean kill.