Blue gate cellar key location: how to find and use it in ARC Raiders
The Blue Gate Cellar Key is one of the more confusing keys in ARC Raiders because it does not name the point of interest it belongs to. Most consumable keys in extraction shooters either label the exact building they unlock or point to a landmark visible on the player map. This key does neither, which is why so many players end up holding it in their inventory for a full session without ever finding the lock it opens. The good news is that the blue gate cellar key location is tied to a small set of cellar hatches scattered across The Blue Gate map, and the easiest one to reach sits in the north-west quadrant near the Olive Grove and Ruined Homestead.
This guide explains where the key is meant to be used, how to plan a route to the most reliable cellar, what kind of loot to expect once you are inside, and which design decisions in ARC Raiders made this key feel different from the rest of the inventory. The same logic also applies if you prefer to run a Night Raid for higher-value drops, or if you want to compare this key with other consumable keys in the game.
Why the Blue Gate Cellar Key is confusing for new players
ARC Raiders treats keys as single-use consumables in most cases, so the design pressure on each one is high. A key that is hard to find wastes a slot, and a key that is found but never used wastes time. The Blue Gate Cellar Key sits in an awkward middle ground because the item description does not name a single mandatory location. Instead, it references “certain cellar doors near The Blue Gate,” which is a region rather than a building.
Players coming from other extraction shooters are used to three patterns:
- A key tied to a single named room, such as a boss arena, a safe house, or a unique loot vault.
- A key tied to a single named building, with the building labelled on the in-game map.
- A region key that opens any of several similar locks inside a clearly marked district.
The Blue Gate Cellar Key belongs to the third pattern, but the cellars themselves are not flagged on the map and many of them are partially buried. As a result, players often walk past the correct hatches without realising they are interactable. The in-game key tooltip is intentionally short, and the community has had to share specific coordinates and route descriptions to make the loop reliable.
Understanding this design choice helps with the rest of the key’s logic. ARC Raiders uses cellars as a lower-tier version of the more famous bunkers and caches scattered across each map. The cellars hold crafting materials and a small chance at rare consumables, which makes them a good mid-session detour rather than a primary objective. A region key that opens several of them is a deliberate design lever that encourages route variation without forcing the player into a single loot corridor.
Where the blue gate cellar key location actually is
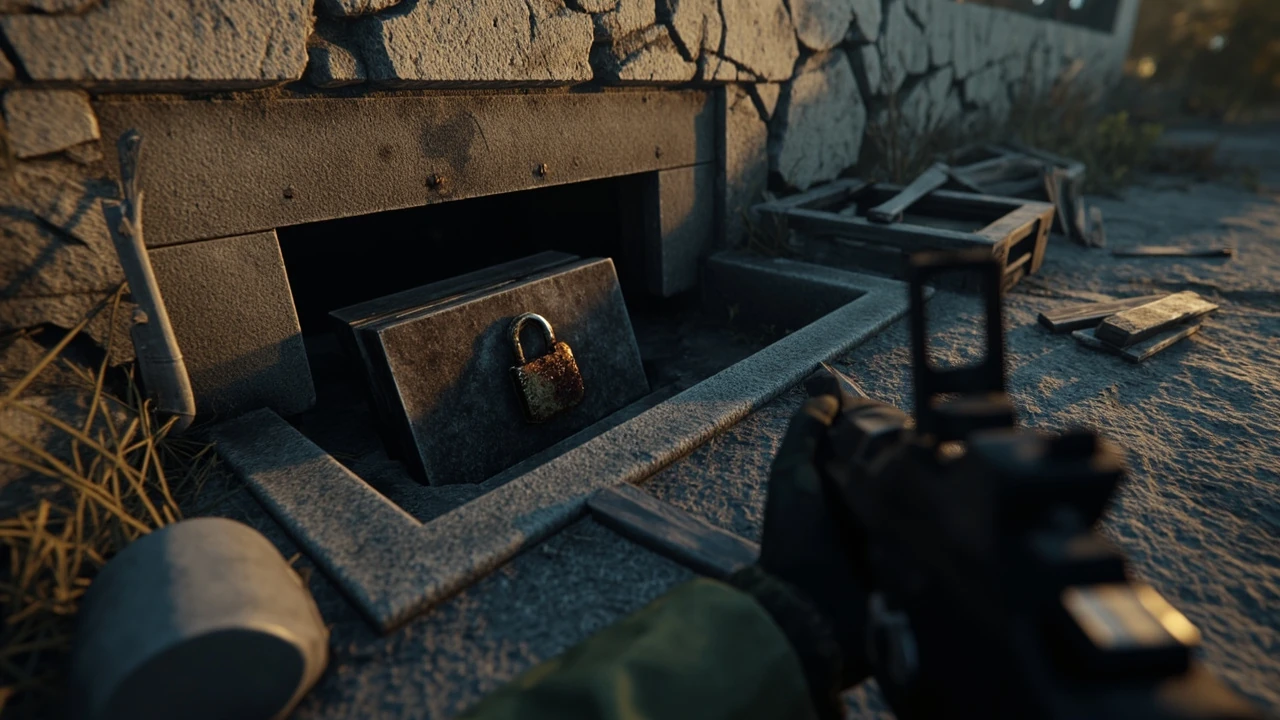
The most reliable blue gate cellar key location is a cellar hatch on the western side of the Ruined Homestead, close to the Olive Grove. From the Homestead, head west along the road that curves downhill, and look for a small stone wall on the left. A half-buried hatch is set into the ground next to that wall. It uses a single rusted padlock, and the key prompt appears as soon as the player gets within interaction range.
This is not the only hatch the key opens, but it is the easiest to reach for two reasons:
- The route from a common spawn point in the north-west of the map is short and follows a road, which makes it predictable in a PvPvE environment.
- The surrounding terrain provides several natural cover options, which is useful because the hatch is in a relatively open area.
The IGN guide covering the Blue Gate Cellar Key confirms that the easiest spot is a cellar hatch near the Olive Grove and Ruined Homestead, and that the key is also accepted at several other cellars attached to houses and buildings across the same map. One extra example the guide points to is a locked cellar south of Raider’s Refuge, and another is at Trapper’s Glade on the western side of the map.
For practical purposes, that means the blue gate cellar key location is best treated as a region of three to six known cellars rather than a single coordinate. Players who learn the visual signature of a cellar hatch can usually identify a valid lock in a few seconds: a low wooden or metal lid, a single padlock, and a stone or concrete surround. That visual rule transfers between every confirmed cellar on the map.
Route plan to the easiest blue gate cellar key location
The route to the Olive Grove hatch can be planned in four steps, which works for both solo and squad play. The plan is conservative on purpose because cellars are mid-value targets, and over-committing to one is a common cause of lost loot.
- Drop into a north-west spawn if your squad comp supports it, and orient toward the Ruined Homestead landmark. The Homestead is visible from the road and from most elevated terrain in the area.
- Approach the Homestead from the east, so the road that leads west toward the Olive Grove is on your left as you pass the main buildings. This gives a clear sightline to anyone pushing from the south.
- Follow the road west until you spot a low stone wall on the left. The hatch sits next to the wall at ground level and is easy to miss if you are watching the horizon instead of the verge.
- Clear the immediate area before interacting with the hatch. Cellars take a few seconds to open, and the audio cue is audible to nearby players. Have one squad member watch the road while the carrier uses the key.
This pattern is similar to how a producer plans a vertical slice: the team focuses on the shortest repeatable loop that proves the mechanic works. The cellar run is essentially a mini-vertical slice for the key: one entrance, one interaction, one payoff, and a clean exit. Players who treat it that way tend to get value out of the key consistently, while players who improvise the route often lose the slot to a competing squad.
What loot the cellars actually drop
Cellars in The Blue Gate map are tuned as secondary loot sources. They are not designed to compete with bunkers, raider caches, or named boss rooms. The general expectation is a small amount of crafting materials, a chance at a quick-use item such as a grenade, and a low but non-zero chance of a rare piece of gear. The community consensus, supported by the same IGN reference, is that the loot is “not too great” but worth the detour when the route is already near the hatch.
This is useful to know because it sets a clear risk-versus-reward frame for the key:
| Loot category | Expected frequency | Typical use |
|---|---|---|
| Crafting materials | High | Always relevant for crafting bench progression, even in short raids |
| Quick-use consumables | Moderate | Grenades, healing items, and deployables that support an immediate fight or an escape |
| Rare gear | Low | Night Raids and squad play increase the chance of a useful roll |
| Cosmetic or vanity items | Very low | Usually tied to season passes or events rather than to cellar rolls |
Players who run the cellars for materials and treat any rare drop as a bonus tend to be happier with the key than players who treat it as a primary objective. That framing also helps with inventory pressure, because the key occupies a slot that could otherwise hold a healing consumable or an ammo pack.
Night Raids and the blue gate cellar key location
ARC Raiders runs a separate Night Raid mode that increases loot quality across the map in exchange for tougher AI and lower visibility. The community advice for the Blue Gate Cellar Key is the same as for most mid-tier keys: Night Raids are the higher-upside option because the same cellar hatches roll against a better loot table.
There are three practical considerations before committing a Night Raid to a cellar run:
- Visibility around the hatch is poor, which means squad coordination matters more than raw aim. A designated spotter with a thermal or night optic is useful.
- The hatch takes longer to feel safe in a Night Raid because the audio cue of opening it is harder to place without visual landmarks.
- The exit route is the same road you came in on, but at night it is easier to walk into a squad that has set up an ambush on the return path.
For a solo player, the cellar run is a fair Night Raid target because the cellars are not high-priority PvP zones. Most squads will focus on bunkers, ARC drops, and the extraction points. A solo player who reaches the hatch first, opens it quickly, and extracts with materials can come out ahead even against heavier squads.
How the Blue Gate Cellar Key compares with other consumable keys
For additional context, ARC Raiders has a wider key economy than many extraction shooters, and not every key behaves the same way. The Blue Gate Cellar Key sits in a specific niche that is easier to reason about once it is placed next to a few neighbours.
| Key type | Scope | Loot tier | Best use case |
|---|---|---|---|
| Blue Gate Cellar Key | Region (multiple cellars on The Blue Gate) | Low to mid | Mid-session material farming on a known loop |
| Single-room key (example: Dam Control Tower Key) | Single building, single lock | Mid to high | Targeted run for a specific named reward |
| Event or boss key | Single room, gated by an event | High | Coordinated squad play with full gear |
| Region cache key | Multiple caches across a district | Mid | Route-flexible farming when the spawn is favourable |
Notice how the blue gate cellar key location sits in the “region” row. The trade-off is flexibility for predictability: any time you are in The Blue Gate and your squad is near a known cellar, the key is useful, but you are never sure which cellar is uncontested. A single-room key gives the opposite trade-off. Once you are in the right place, the path is obvious, but if the spawn is far from the building, the run can be expensive.
Common mistakes when running the key
Most of the frustration around the blue gate cellar key location comes from a small set of repeatable mistakes. Recognising them ahead of time is the cheapest way to improve your success rate without changing your build.
- Using the key on a hatch that does not accept it. Some cellars on The Blue Gate map are gated by progression rather than by a consumable key, and a few are locked behind ARC events. The padlock model is usually the tell: a clean padlock reacts to the key, while an ARC-style seal does not.
- Failing to clear the area before interacting. Cellars are quiet, but the opening animation is not. Treat the hatch as a noisy objective, similar to a hacking minigame in other extraction titles.
- Treating the loot as a primary objective. Because the loot is mid-tier, players who chase cellars at the cost of extract timing tend to lose more than they gain. Plan the cellar as a detour, not a destination.
- Running the key in a Night Raid without a dedicated spotter. The increased loot quality is not worth a wipe caused by poor visibility.
- Hoarding the key for a perfect run. The key is consumable, the cellars respawn each match, and the value is in the loop, not in any single drop.
These mistakes also map onto a production concept that comes up often in game development. A consumable that has a high learning curve but a low per-use ceiling is designed to be used often. When developers gate an entire archetype of loot behind such a key, they want players to internalise the route, not to wait for a perfect moment. Players who treat the key as a routine detour extract more value than players who treat it as a lottery ticket.
How to verify you found the right blue gate cellar key location
Because cellars look similar and the map does not flag them, it helps to have a small verification checklist. Run through it the first few times you use the key, and you will start to recognise the pattern without thinking about it.
- The hatch has a single rusted padlock, not an ARC seal or a digital lock.
- The padlock model faces the road, which is consistent with a road-adjacent cellar rather than a building-attached one.
- The key prompt appears before the animation starts. If the prompt does not appear, you are probably looking at a non-keyed cellar.
- The hatch is at ground level, not on a raised platform. Raised platforms usually indicate a different loot source.
- The surrounding area is quiet at the moment you interact. If a fight is happening nearby, the cellars on this map are not worth the risk.
Once you have run this checklist a few times, the loop becomes muscle memory. The same pattern shows up in QA workflows: the first run of a new test case is a discovery run, and the next five runs are validation runs. The cellars reward the same shift from discovery to validation.
Squad play versus solo play for the key
Squads have a structural advantage at cellars because they can split tasks between a carrier, a spotter, and a flanker. Solo players can still extract value, but the route needs to be tighter. A simple rule of thumb is to use the key only when the spawn is within roughly one minute of the Ruined Homestead. If the spawn is far, the time cost outweighs the loot value.
| Player count | Recommended approach | Risk level |
|---|---|---|
| Solo | Run only on a favourable spawn, treat the cellar as a detour, extract immediately after | Moderate |
| Duo | One opens, one watches the road, share materials at extract | Lower |
| Squad | Assign a spotter and a flanker, plan an alternate hatch in case the main one is contested | Lowest per player |
Squads also have an edge on Night Raids because the cellar is a quiet, low-traffic target. A coordinated squad can clear the surrounding buildings, open the hatch, and extract before any other squad realises the key has been used. Solo players rarely have that luxury, which is why the cellar is a better Night Raid target for groups than for individuals.
Designing a personal route around the key
Players who get the most out of the blue gate cellar key location tend to design a route that uses the cellar as a waypoint rather than a destination. The pattern is similar to the way a level designer places secondary objectives between two primary beats: the cellar gives the player a reason to be in the area, and the area gives the player a reason to use the cellar.
One workable loop for a solo player looks like this:
- Spawn in the north-west, orient toward the Ruined Homestead, and use the road as a guide.
- Open the cellar near the Olive Grove if uncontested, and grab materials without lingering.
- Continue west toward Trapper’s Glade, where another cellar accepts the same key if the hatch has already been used on this map.
- Loop back through Raider’s Refuge, where a third cellar accepts the key, and then head for the closest extraction point.
This kind of loop works because it never forces the player to backtrack. Each step introduces a new possible interaction with the same key, and the extraction point is always within reach. It is also forgiving when the spawn is unfavourable: if the player spawns on the opposite side of the map, they can ignore the cellars for that raid and use the key on a future run without losing value.
How this key fits the wider ARC Raiders key economy
ARC Raiders uses keys as both a loot sink and a route-shaping tool. The Blue Gate Cellar Key is a good example of the second role. It does not add a powerful reward to the game on its own, but it makes the existing map feel more dynamic by giving players a reason to visit cellars they would otherwise walk past. Region keys like this one also help the developers test new loot tables without having to ship a new building every season.
For players, the practical implication is that region keys are best learned as a habit rather than as a one-time objective. The same habit also improves overall map knowledge, because the cellars are spread across the map and each one teaches a small piece of terrain. Players who have used the Blue Gate Cellar Key ten times tend to know the road network in the western half of the map better than players who have used it once.
That habit is also why it is worth keeping the key in your loadout even when you are not chasing a specific drop. It is cheap to carry, useful on most runs, and forgiving when the spawn is bad. Compared with a high-end boss key, the Blue Gate Cellar Key is closer to a tool than a ticket, and it should be used like one.
Checklist before you use the key
Use this list as a quick pre-raid check. It is intentionally short because the cellars are a routine objective rather than a high-stakes one.
- Confirm the key is in your active loadout and not in the stash.
- Identify the closest known cellar to your expected spawn before the raid starts.
- Assign a spotter if you are in a squad and planning a Night Raid.
- Decide whether the cellar is a detour or the primary objective, and stick to that plan.
- Plan the exit path to the nearest extraction point before opening the hatch.
Players who run this checklist tend to feel less frustration with the key because the loop becomes predictable. Predictable loops are also what good extraction shooter design tends to reward: the players who plan the route usually extract more value than the players who improvise.
When to skip the blue gate cellar key location
There are a few situations in which the key is best left in the inventory. Skipping the cellar in these cases is not a waste, it is good resource management.
- You are on a timed contract that requires you to be at a specific named location. The cellars are not worth the detour in that case.
- The squad is low on healing or ammo. A healing consumable is a better use of the slot than a key for a mid-tier loot source.
- The map is contested and the cellar is in a high-traffic area. Cellars are not worth a wipe.
- You are running a loadout that depends on stealth, and the cellar is in a noisy zone. The audio cue will give away your position.
Knowing when not to use a key is part of learning the broader extraction loop. The same judgement applies to higher-tier keys, where skipping a bad run is often the difference between a profitable session and a string of empty extractions.
Frequently asked questions
What is the easiest blue gate cellar key location in ARC Raiders?
The easiest blue gate cellar key location is a cellar hatch on the western side of the Ruined Homestead, close to the Olive Grove. From the Homestead, head west along the road and look for a small stone wall on the left. The hatch sits next to the wall, and the key prompt appears as soon as you get within interaction range. The same key also opens other cellars across the map, but this one is the shortest and most predictable route from common north-west spawns.
Does the Blue Gate Cellar Key work on more than one cellar?
Yes. The Blue Gate Cellar Key is a region key, so it works on multiple cellars attached to houses and buildings across The Blue Gate map. Confirmed examples include a hatch near the Olive Grove and Ruined Homestead, a cellar south of Raider’s Refuge, and a hatch at Trapper’s Glade on the western side of the map. Because the key is single-use, you only get one cellar per key, but the choice of which one to open is yours.
Is the Blue Gate Cellar Key worth using on a Night Raid?
For most players, yes, as long as the route is planned. Night Raids increase the loot quality of cellars, which is a fair trade for the reduced visibility. Bring a dedicated spotter, plan the exit before opening the hatch, and treat the cellar as a detour rather than a primary objective. Solo players should be more cautious because the audio cue of opening the hatch is harder to mask at night.
Can I use the Blue Gate Cellar Key on the Dam Control Tower Key area?
No. The Blue Gate Cellar Key is scoped to cellars on The Blue Gate map. Other named keys, such as the Dam Control Tower Key, are tied to specific locks on different maps or in different regions. Carrying a region key does not give you access to locks outside that region, so the inventory slot trade-off is real.
What kind of loot should I expect from a cellar in The Blue Gate?
Expect crafting materials as the main reward, a moderate chance of a quick-use consumable such as a grenade, and a low chance of a rare gear piece. The loot is tuned as a secondary source, so it is best used to top up materials between bigger objectives rather than as a primary farming route. Night Raids improve the rare drop chance, but the materials are the consistent value.
How do I tell the difference between a keyable cellar and a non-keyable one?
Keyable cellars have a single rusted padlock and sit at ground level next to a road or a small stone wall. Non-keyable cellars often use an ARC-style seal, sit on a raised platform, or are attached to buildings that are gated by progression rather than by a consumable key. If the key prompt does not appear when you get close, you are probably looking at the wrong kind of lock.
Is it worth running the key as a solo player?
Solo players can still extract value from the Blue Gate Cellar Key, but only on a favourable spawn. A good rule of thumb is to use the key only when the Ruined Homestead is within roughly one minute of your drop point. If the spawn is far, the time cost outweighs the loot value, and it is better to save the key for a future run.
Does the Blue Gate Cellar Key respawn?
The key itself is a consumable, so it does not respawn once used. The cellars it opens do refresh each match, which means a new key will open a new cellar on the next raid. The loop is designed to be repeatable, not one-time, so treat the key as a routine tool rather than a special ticket.
What is the best squad setup for a cellar run?
For a squad, the cleanest setup is a carrier who holds the key, a spotter who watches the road, and a flanker who covers the most likely ambush angle. The carrier should approach the hatch only after the spotter confirms the area is clear, and the flanker should stay on the high ground if the terrain allows it. This setup is overkill for a single cellar, but it scales well if the squad plans to chain two or three cellars in the same raid.
Should I use the key on the first cellar I find or shop around?
Use the key on the first cellar you find if the area is clear and the hatch accepts the key. Holding the key while you hunt for a “better” hatch usually costs more than it gains, because the key is single-use and the loot ceiling is similar across cellars. The faster loop is to commit to the first valid hatch, extract, and run the key again on a future raid.