Legendary animal locations rdr2: a complete field guide
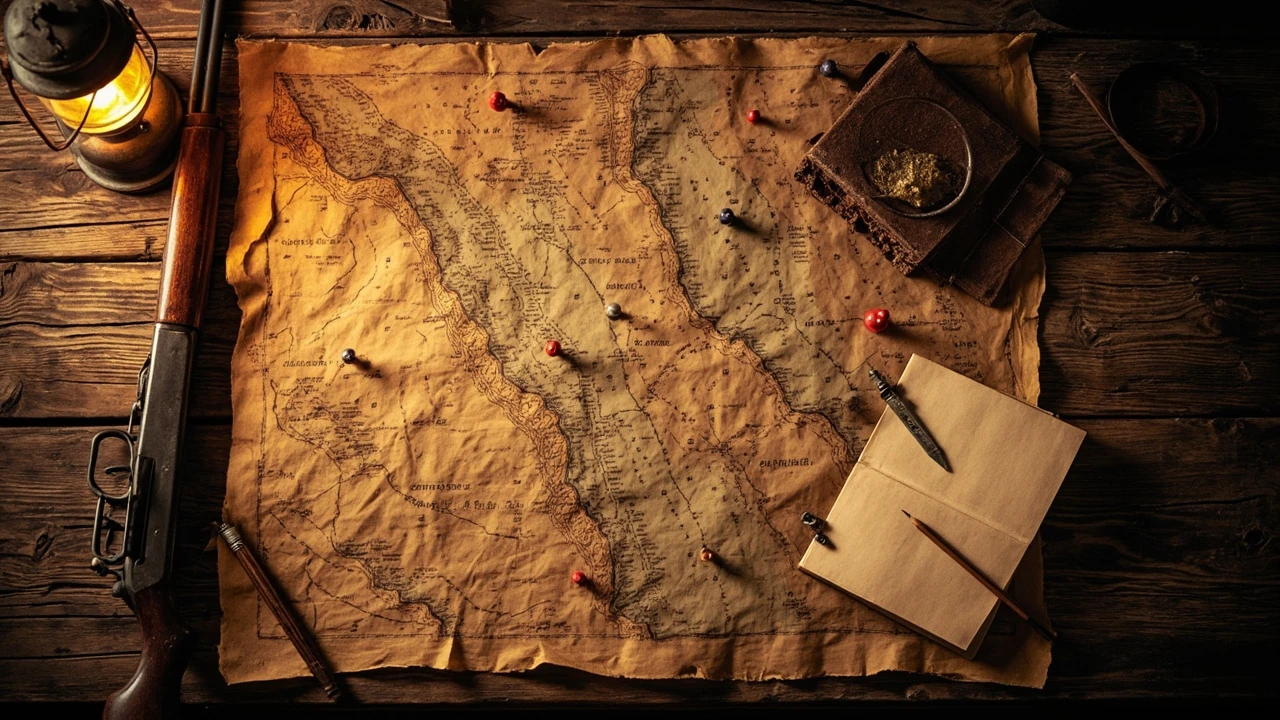
Tracking down every rare creature in the open world of Red Dead Redemption 2 turns the entire frontier into a long, slow puzzle. Legendary animal locations in rdr2 are scattered across every region, and the game only flags them after you accept a specific mission from a master hunter in the wilderness camp. Once the mission is active, a golden question mark appears on the map, the relevant animal stops being a normal spawn, and the encounter has unique rules: a single clean kill, a guaranteed three-star carcass, and a one-time-only carcass. Missing the animal, breaking the legendary pelt, or letting the carcass disappear means waiting for the encounter to respawn on a long timer. A working map of the hunts is therefore as much a planning tool as a route.
This guide covers how the legendary system works, what the field hunt actually demands from the player, and where every confirmed creature can be found. It also frames the work as a small production problem: each trophy is a one-shot acquisition, the order of attempts changes the difficulty of later ones, and your camp upgrades gate several crafting rewards. Treating the collection as a checklist, with prerequisites and prerequisites-of-prerequisites, is the only reliable way to finish it without losing trophies to bad luck or poor preparation.
How the legendary hunt system works
Before plotting a single pin on the map, it helps to understand the rules the engine applies to legendary encounters. The system is built from a few consistent behaviors, and the same behaviors show up whether you are hunting the Bharati elk or the final wolf in the snow.
How you unlock a legendary target
Every legendary animal is gated behind a single story beat: the stranger mission chain from the legendary hunter at the wilderness camp. The hunter sits next to the fast-travel post in the camp, and the conversation cycle rotates the available species every in-game day. You must speak to him at least once, take the map, and read the pamphlet he hands you before the golden question mark appears on the world map. The pamphlet describes the animal, its preferred bait, and the rough biome where it lives, but it never gives exact coordinates.
If you decline the mission, the golden mark does not appear, and the encounter cannot start. The mission remains in your journal until you accept it, which lets players pace the work by region rather than by story order. There is no level or rank requirement, but several hunts are easier with a specific weapon or a specific horse, and a few are nearly impossible until you upgrade the camp, the satchel, and the lasso.
What changes once the encounter is active
Once the map flag goes gold, the spawn rules change in a way the rest of the wildlife system never does. A single instance of the target species appears in a defined sub-region, replaces the normal spawn, and stays alive until the encounter ends. The animal is not skinnable in the standard way: the carcass becomes a legendary carcass that must be delivered to the trapper in one piece. The legendary pelt is then turned into unique clothing, and the legendary carcass is turned into a unique trinket or talisman from a different vendor.
Damage rules also change. Legendary animals take damage from a much narrower band of weapons, and the wrong ammo type either deals reduced damage or fails to score a clean kill. A clean kill awards a three-star pelt and unlocks the best crafting tier. Any other outcome drops the quality to two stars or, in some cases, prevents the legendary pelt from appearing at all. The encounter ends the moment the carcass enters the wagon, is sold, or sits too long in the world; at that point, the species cannot be hunted again for a long cooldown window.
Why a one-shot kill matters
Three-star pelts are the entire reason the legendary hunt is a different system. Normal three-star kills rely on the right weapon for the size class, and the same rule still applies here, but legendary animals have a hidden integrity threshold tied to the clean-kill check. If the animal flees after the first shot, runs, and you chase it down, the legendary pelt often downgrades to a two-star or vanishes. Players chasing the full set have learned to reload the encounter from a manual save if the first shot is anything less than perfect.
Two practical consequences follow. First, stealth and baiting matter more than raw damage. Second, the encounter design is built around a player who has already learned the basic hunting loop. New players usually lose their first few pelts for exactly this reason, and the cooldown windows that follow are a long reminder to use a scoped rifle, a small game arrow, or a thrown weapon on the correct body part.
Prerequisites before the first hunt
Every legendary hunt in the table below assumes the player already has a baseline of equipment and upgrades. A player who skips these steps can still attempt the hunts, but loses most of the trophies to downgrade or to a long walk back to camp with a ruined pelt.
Camp, satchel, and horse upgrades
The first prerequisite is the camp itself. The wilderness camp in chapter 2 and the main camp upgrades through the ledger in chapter 2 onward gate the entire legendary system. Without the camp, the legendary hunter does not exist, and without the ledger upgrades the player cannot carry enough provisions, bait, or crafted ammo to make a clean run.
Three camp-driven prerequisites are worth listing because they show up in every guide and most forum troubleshooting threads:
- Leather working tools at the camp craftsman, which let you build the improved satchel, the reinforced equipment bag, and the legend of the east satchel. Each one adds inventory capacity, and the capacity unlocks the ability to hold bait, small game arrows, and a rifle in the field at the same time.
- The camp stew upgrade, which is required only as a long-term convenience, but increases the core stats that the player needs when a legendary animal flees across hostile territory.
- The horse station, which is a chapter 2 upgrade and the only reliable way to store a high-tier horse with a good handling stat near the wilderness camp.
Weapons, ammo, and consumables to keep stocked
The legendary hunts reward a small set of weapons and punish everything else. Players who finish the full set usually carry the same four weapons in the field and rotate them per animal.
- A scoped rolling-block rifle, used for medium and large animals at long range. The scope is the difference between a clean heart shot and a hit that sends the animal running.
- A bow with improved arrows, used for large game in the open and for the one-shot integrity check on several legendaries.
- A small game arrow, used exclusively for small legendaries and for the coyote and the muskrat in the southern regions.
- A thrown weapon or a pistol, used as a backup when the animal is too close for a rifle and the bow needs to be re-nocked.
Bait is the other consumable that does most of the heavy lifting. Each legendary target has a preferred bait, and the bait is bought from a general store or crafted at the camp. The bait must be in the inventory before the encounter starts, because the bait is consumed when the player triggers the scripted spawn. A player who arrives at the location without the right bait usually ends the encounter without a kill.
Stamina, tonics, and horse handling
Several hunts are endurance tests, not aim tests. The wolf, the Bharati elk, and the iguana on the islands all require extended chases, and a player with a low-level stamina core will lose the kill because the horse tires before the animal does. Tonics and the camp stew make those chases survivable. Horse handling matters because the player needs to dismount, fire, and remount without losing the heart-shot angle, and only a horse with reasonable courage and acceleration supports that pattern.
Legendary animal locations rdr2: full regional map
The table below groups every confirmed legendary animal by region and lists the rough coordinates, the preferred bait, the recommended weapon, and the pelt and carcass reward. Coordinates are given as relative map positions rather than exact lat-long, because the in-game map is the only reliable reference. The full encounter chain is split into three tiers: the early-game tier available from chapter 2, the mid-game tier available from chapter 4, and the late-game tier that becomes reliable only after the Bison, Elk, and Moose are unlocked.
Tier 1: the early-game legendaries
| Animal | Region | Rough map area | Preferred bait | Recommended weapon | Reward |
|---|---|---|---|---|---|
| Legendary Bharati grizzly bear | Grizzlies East, Ambarino | North of O’Creagh’s Run, near the cliff edge | Crafted potent predator bait | Scoped rolling-block rifle, heart shot | Bear tooth, hat band, and coat from the trapper |
| Legendary wolf | Cumberland Forest, New Hanover | South of the trapper cabin, along the treeline | Crafted potent predator bait | Scoped rolling-block rifle, head shot | Wolf heart, talisman from the fences |
| Legendary coyote | Scarlett Meadows, Lemoyne | West of Braithwaite Manor, near the field | Crafted potent predator bait | Small game arrow or scoped rifle | Coyote pelt, talisman and trinket |
| Legendary beaver | Big Valley, West Elizabeth | South-west of Blackwater, near the river bend | Herbivore bait | Small game arrow | Beaver tooth, hat band, charm |
| Legendary white bison | Lake Isabella, Big Valley | East of the frozen lake shore | Herbivore bait | Scoped rolling-block rifle, heart shot | Bison horn, coat, and a heavy hat from the trapper |
Tier 2: the mid-game legendaries
| Animal | Region | Rough map area | Preferred bait | Recommended weapon | Reward |
|---|---|---|---|---|---|
| Legendary elk | Northern Grizzlies, Ambarino | East of the river, near the snowline | Herbivore bait | Scoped rolling-block rifle, heart shot | Elk antler, coat, and a heavy vest |
| Legendary buck | Big Valley, West Elizabeth | North of the trapper, along the lake | Herbivore bait | Scouted rifle or small game arrow | Buck antler, hat band, gloves |
| Legendary boar | Bluewater Marsh, Lemoyne | South of the bayou shack, near the swamp edge | Predator bait | Improved arrow or rifle | Boar tusk, talisman, gloves |
| Legendary bull gator | Bayou Nwa, Lemoyne | South of Lagras, in the deeper water | Predator bait | Repeater or rifle, eye shot | Gator tooth, coat, and a unique talisman |
| Legendary fox | Scarlett Meadows, Lemoyne | East of Rhodes, near the broken fence | Small game bait | Small game arrow | Fox claw, hat band, charm |
Tier 3: the late-game legendaries
| Animal | Region | Rough map area | Preferred bait | Recommended weapon | Reward |
|---|---|---|---|---|---|
| Legendary moose | Roanoke Ridge, New Hanover | North-east of Annesburg, in the bog | Herbivore bait | Scoped rolling-block rifle, heart shot | Moose antler, coat, and a heavy coat from the trapper |
| Legendary pronghorn | Hennigan’s Stead, New Hanover | South of the ridge, near the open plain | Herbivore bait | Scouted rifle or small game arrow | Pronghorn horn, hat band, vest |
| Legendary panther | Braithwaite Manor, Lemoyne | South of the manor, along the forest edge | Predator bait | Scoped rolling-block rifle, head shot | Panther eye, coat, and talisman from the fences |
| Legendary cougar | Gaptooth Ridge, New Austin | North of the ridge, in the rocky pass | Predator bait | Scoped rolling-block rifle or improved arrow | Cougar tooth, coat, and gloves |
| Legendary ram | Valentine region, The Heartlands | North of the road, in the snowed hills | Herbivore bait | Scoped rolling-block rifle, heart shot | Ram horn, hat band, and a heavy coat |
How to plan the route
Because the system is one-shot per animal, route planning is the only reliable way to keep every pelt. Three planning rules consistently make the difference between a clean set and a half-finished journal.
Group hunts by region and by chapter
Chapter 2 unlocks the entire legendary chain at the camp, but several hunts are nearly impossible in chapter 2 because the player lacks the rolling-block rifle, the reinforced satchel, and the camp upgrades that carry enough bait. The first clean run usually happens in chapter 4 or later, after the satchel is upgraded and the ledger purchases are complete. A practical plan therefore groups hunts by the chapter in which the player can attempt them, not by alphabetical order. To clarify the background to Red Dead Redemption 2, the Red Dead Redemption offers a concise reference.
Save before the encounter
Manual saves are the only reliable way to redo a single legendary kill. If a shot lands wrong, the player can reload the manual save, ride back to the same location, and the encounter is in the same state as the first attempt. Without the manual save, the player either accepts a lower-quality pelt or waits out a long respawn timer that effectively ends the run for that session.
Carry the right bait and ammo in advance
A common failure pattern is to arrive at the location with the correct weapon but the wrong bait, or with the correct bait but a low-grade arrow. The pre-hunt checklist, run before the player mounts the horse, prevents most of those losses:
- Check the legendary hunter’s pamphlet for the preferred bait and place the bait in the top of the satchel so it is reachable in a chase.
- Refill the rolling-block rifle and the bow with the correct ammo type, and verify the small game arrow is in the quiver.
- Confirm the legendary pelt is not already in the inventory from a previous run, because carrying an existing legendary pelt into the encounter is a common reason for the inventory to drop the new one during the scripted cleanup.
- Mark the wilderness camp on the map and the nearest trapper, because the trapper is the only vendor that accepts a legendary pelt directly.
Step-by-step for a single clean kill
The same five-step pattern works for nearly every encounter, and the variation between animals is mostly in the bait and the weapon. Using a stable pattern reduces the cognitive load when the animal spawns, and lets the player focus on the heart shot instead of the menu.
- Travel to the rough map area from the camp. The encounter is in a fixed sub-region, not at the exact pin, so the player should ride into the sub-region and let the encounter trigger on its own.
- Dismount, study the animal with the binoculars, and confirm the three-star legendary icon is visible on the target. If the icon is missing, the spawn is a normal animal and the encounter has not triggered yet.
- Place the bait, retreat to a position with a clear sightline, and wait for the animal to enter the scripted path. The scripted path is the same on every attempt, so a player who has done the hunt once already knows where the line of sight should be.
- Take the heart shot or the head shot depending on the target. The rolling-block rifle is the only weapon that consistently scores a one-shot integrity check on the larger animals, and the small game arrow is the only reliable option for the small ones.
- Skin the carcass immediately, store the legendary pelt on the horse, and ride to the trapper. The trapper is the only vendor that turns a legendary pelt into the unique clothing line, and the carcass is turned into the talisman or trinket at a different vendor.
Weapon and ammo reference
Each legendary animal has a size class, and the size class dictates the weapon band. Players who memorize the bands can plan a loadout that works across an entire region, which is more efficient than swapping the inventory at every encounter.
Size class and weapon band
- Small legendaries (coyote, fox, muskrat, beaver): small game arrow or a varmint rifle with the correct ammo. A clean kill awards a three-star pelt and the legendary icon.
- Medium legendaries (buck, boar, pronghorn, ram): improved arrow, scoped repeater, or a scoped rolling-block rifle. The heart shot is the standard integrity check.
- Large legendaries (bison, elk, moose, bear, panther, cougar, bull gator, white wolf): scoped rolling-block rifle with high-velocity ammo, eye or heart shot, and a clear sightline before the encounter starts.
Ammo quality and its effect on the clean-kill check
Ammo quality matters more than weapon quality. Standard ammo can kill a legendary, but the clean-kill check is biased toward the high-velocity band and the express rounds. Players chasing a perfect pelt run usually carry only high-velocity and express ammo for the legendary hunts, and leave the standard ammo in the satchel for general hunting. The bias is small in absolute terms, but it shows up consistently in the clean-kill rate, especially on the larger animals.
Crafting outcomes: trapper, fences, and the camp
The legendary system exists because the trophies feed a separate crafting chain. Three vendors accept the outputs, and each vendor pays a different role in the set progression.
Trapper: the legendary pelt crafting chain
The trapper is the only vendor that accepts a legendary pelt directly. He sits in a fixed camp in the wilderness, and his inventory rotates by region. The pelt feeds a long list of unique clothing items: the bear coat, the wolf coat, the ram hat, the elk vest, the bison hat, the alligator vest, and several of the strongest trinkets. The pelt is consumed on use, so the player must complete the desired outfit before selling or donating the pelt to any other vendor.
Fences: the legendary carcass crafting chain
The legendary carcass is a separate item from the legendary pelt and is turned into talismans and trinkets at a fence. The most useful rewards are the legendary wolf heart, the legendary bear tooth, the legendary elk antler, and the legendary panther eye. Each talisman gives a permanent core stat boost, and several talismans stack with the camp stew. The carcass, like the pelt, is consumed on use, so a player who plans the order of crafts in advance can finish a full set without losing a talisman to a low-priority craft.
Camp: the satchel and the equipment upgrades
The camp does not consume the legendary outputs, but it consumes the inputs. The camp craftsman, the leather working tools, and the ledger purchases are the supporting system that makes the legendary hunts survivable. A player who upgrades the satchel first, the camp second, and the horse third is the player who finishes the legendary set without losing a single pelt.
Troubleshooting the most common failures
Even with the right weapon and the right bait, the legendary hunt has a small set of failure modes that show up in every guide and every forum thread. Working through the list in order is usually faster than redoing the encounter blind.
The legendary animal does not spawn
If the golden question mark is on the map and the rough area is reached, but the target does not appear, the most common cause is the wrong bait in the inventory. The second most common cause is a normal animal that has spawned in the same area and is blocking the encounter. A third, less obvious cause is a camp mission or a stranger mission that has spawned a different golden question mark and is overriding the legendary encounter. Dismissing the active mission and re-reading the pamphlet usually fixes the override.
The pelt downgrades to two stars
A two-star pelt on a legendary target means the kill was not clean. The most common cause is a shot that does not hit the heart or the head, often because the player used a repeater instead of a scoped rifle, or used the wrong ammo band. The fix is to reload the manual save, ride back to the location, and use the correct weapon and ammo on the next attempt.
The legendary pelt is lost between the encounter and the trapper
Losing a pelt between the encounter and the trapper is almost always a horse problem. The horse was killed, the player fell off a cliff, or the player switched to a fast-travel post that did not have the horse attached. The fix is to keep the legendary horse on the same horse the player rides into the encounter, and to avoid the fast-travel post until the pelt is on the trapper’s counter.
The animal flees across a region border
A few hunts, most notably the legendary cougar and the legendary panther, cross region borders when they flee. The animal is not lost, but the encounter rules reset, and a new spawn can appear on the other side. The fix is to use a fast horse with high courage, keep the player mounted until the animal is in the open, and dismount only for the heart shot.
Production framing: why a checklist is a real design tool here
The legendary system is unusually structured for an open-world game. Each encounter has a single correct path, a single clean-kill target, and a single crafting output, and the failure modes are stable enough that the entire set can be planned as a production schedule. That structure is the reason guides like this one are useful not as a cheat sheet but as a small planning document: it lets a player decide which hunts to attempt first, which crafting rewards to prioritize, and which prerequisites to finish before the next attempt.
For a game producer or a systems designer, the same structure is a useful case study in how a content team can gate a long-tail collection without breaking the open-world economy. The legendary chain is locked behind a single NPC, the crafting chain is locked behind two vendors, and the prerequisites are scattered across the camp upgrade tree. Each gate is small, each gate is testable, and the entire chain is recoverable from a single manual save. The design works because the gates are visible, the rules are consistent, and the failure modes are recoverable. A player who treats the chain as a small production problem, with prerequisites, a schedule, and a manual save, finishes the set.
For a player, the chain is best approached as three short sprints. Sprint one is the early-game tier, sprint two is the mid-game tier, and sprint three is the late-game tier. Each sprint ends with a full set of pelts at the trapper and a full set of carcasses at the fences, and the next sprint starts only after the previous set is complete. The pacing is not a constraint; it is the only reliable way to keep every pelt on a single playthrough.
Frequently asked questions
Do I have to finish the legendary hunter’s mission chain in order?
No. The legendary hunter’s chain unlocks every legendary animal as soon as the player accepts the master map at the camp. The order in which the hunts are attempted is up to the player, and the golden question mark cycles through the available species every in-game day. The most reliable order, in practice, is the region-by-region order: finish the Ambarino legendaries first, then the New Hanover and Lemoyne legendaries, then the West Elizabeth and New Austin legendaries.
Can I hunt more than one legendary animal at a time?
Yes, but the player can carry only one golden question mark per session in some patches, and switching between active legendaries forces a reload of the map. The cleanest pattern is to accept the next mission only after the previous one is skinned and the legendary pelt is on the horse. Holding two active missions at once increases the chance that the bait inventory is wrong for one of them.
What is the best weapon for a clean legendary kill?
The scoped rolling-block rifle with high-velocity or express ammo is the best general-purpose option for the medium and large legendaries. For the small legendaries, the small game arrow is the only reliable option. A bow with improved arrows is a close second on the large animals, but the heart-shot check is more forgiving with the rolling-block rifle.
What happens if the legendary pelt is ruined?
A ruined legendary pelt cannot be turned into a unique craft at the trapper. The player can still sell it for a small amount, but the unique clothing line is locked until the legendary animal respawns. The respawn timer is long, and a player who loses multiple pelts in one run usually has to wait for the next chapter to finish the set.
Do legendary animals respawn?
Yes, but on a long timer and only after a specific set of conditions. The animal respawns only after the player advances the story, fast-travels across the map, or sleeps at the camp. The respawn is not a guaranteed loop, and a player who relies on the respawn usually loses more pelts than a player who saves before the encounter.
Can I use a sniper rifle for legendary hunts?
The sniper rifle and the long-range scoped variants are not in the standard legendary hunt loadout. The rolling-block rifle is the weapon the system expects, and the sniper rifle is reserved for story missions. A player who uses the sniper rifle on a legendary hunt usually gets a one-shot kill, but the integrity check is biased against the sniper rifle and the pelt quality drops in some patches.
Do I need to upgrade the camp before the first hunt?
Yes. The first hunt is technically possible without the camp upgrade, but the player cannot carry enough bait, small game arrows, or provisions to make a clean run. The leather working tools at the camp craftsman are the first upgrade, and the satchel upgrade is the first crafting reward. The camp ledger purchases can be delayed until chapter 4, but the satchel and the leather working tools should be finished in chapter 2.
Are the legendary animal locations the same in Red Dead Online?
No. Red Dead Online uses a different spawn system and a different pelt crafting chain. The legendary system in the single-player campaign is tied to the master hunter and the trapper, and the equivalent system in the online mode is tied to the naturalist role and a different vendor. The locations and the rewards do not match between the two modes.
What is the fastest way to finish the entire set?
Finish the satchel upgrade and the leather working tools first, then run the hunts in a single long session with manual saves at each location. Carry the scoped rolling-block rifle, the bow, the small game arrow, and a full bait set, and switch weapons only when the target size class changes. The full set is achievable in a single session if the manual saves are placed before every encounter.
What is the best legendary reward in the set?
It depends on the player build. For a combat-heavy player, the legendary wolf heart and the legendary bear tooth are the strongest talismans because they improve the dead-eye core and the health core. For a hunting-heavy player, the legendary alligator tooth and the legendary moose antler are the most useful trinkets because they improve the hunting loot quality. For a fashion-focused player, the bison hat and the ram coat are the most distinctive clothing items in the trapper’s line.